
NOTE
This script is deprecated, please check this post instead.
If you're using or testing Munki you probably know about manifests, most probably you don't want just one manifest to rule them all (site_default). It can be beneficial to assign packages to different departments or other groups in your organization. If you don't yet know what a manifest is, have a look at my post about integrating Munki with MEM. This is kind of an extension of that post.
So what Tobias, you want me to manually create a manifest for each device and add included manifests? Of course not, we're going to automate this task with the help of Azure Automation and Python.
I was in this seat myself and decided to look into how this can be automated, I turned to Python because this requires us to work with .plist files which is a breeze to do here compared to Powershell. Now, I'm new to Python so if you have suggestions or improvements I'm all ears!
NOTE: Please don't do the initial run to a production Munki repository, always test first!
Lets break down the script we are using, (or if you can't be bothered jump to the setup section)
This function get's our access token that we're going to use when making calls to Graph API. Required parameters to pass are: tenantname, the name of your Azure tenant, clientid, the id of your app registration (we'll come back to that), clientsecret, the secret on your app registration and resource resource. Clientid and clientsecret are used to authenticate to your Azure AD app.
def obtain_accesstoken(tenantname,clientid,clientsecret,resource):
    auth_context = AuthenticationContext('https://login.microsoftonline.com/' +
        tenantname)
    token = auth_context.acquire_token_with_client_credentials(
        resource=resource,client_id=clientid,
        client_secret=clientsecret)
    return token
Here we make the actual request to the Graph API, the endpoint parameter determines with Graph endpoint we want to call, token is used to authenticate the request. The function checks if q_param contains a value, if it does it passes a query in the request. In our case we're using it to get only macOS devices with {"$filter":"operatingSystem eq 'macOS'"}. If something other than a 200 response is returned an exception is raised, the JSON is parsed and if it contains @odata.nextLink the data looped until there's no more results and combines it to one JSON.
def makeapirequest(endpoint,token,q_param=None):
    ## Create a valid header using the provided access token
    ##

    headers = {'Content-Type':'application/json', \
    'Authorization':'Bearer {0}'.format(token['accessToken'])}

    ## This section handles a bug with the Python requests module which
    ## encodes blank spaces to plus signs instead of %20.  This will cause
    ## issues with OData filters

    if q_param != None:
        response = requests.get(endpoint,headers=headers,params=q_param)
    else:
        response = requests.get(endpoint,headers=headers)
    if response.status_code == 200:
        json_data = json.loads(response.text)

        ## This section handles paged results and combines the results
        ## into a single JSON response.  This may need to be modified
        ## if results are too large

        if '@odata.nextLink' in json_data.keys():
            record = makeapirequest(json_data['@odata.nextLink'],token)
            entries = len(record['value'])
            count = 0
            while count < entries:
                json_data['value'].append(record['value'][count])
                count += 1
        return(json_data)
    else:
        raise Exception('Request failed with ',response.status_code,' - ',
            response.text)
This function is used to establish a connection to a specific container in Azure Storage, storing it and returned as source_container_client.
def azure_connect_conn_string(source_container_connection_string, source_container_name):
    try:
        blob_source_service_client = BlobServiceClient.from_connection_string(source_container_connection_string)
        source_container_client = blob_source_service_client.get_container_client(source_container_name)
        return source_container_client

    except Exception as ex:
        print ("Error: " + str(ex))
current_manifests creates a list that will hold the manifests in the container today. The function gets all blobs in the specified path in the container using blob_path and is authenticated with connection_instance that we got from def azure_connect_conn_string.
current_manifests = []
def container_content_list(connection_instance, blob_path):
    try:
        source_blob_list = connection_instance.list_blobs(name_starts_with=blob_path)
        for blob in source_blob_list:
            blob_name = blob.name.rsplit('/',1)[1]
            current_manifests.append(blob_name)

    except Exception as ex:
        print ("Error: " + str(ex))
The below will create a temporary .plist file that is then uploaded to the Azure Storage container, we again use connection_instance to authenticate local_file_name which will be the name of our .plist, container_name to specify which Azure Storage container to upload to and manifest_template that is the .plist data.
def create_plist_blob(local_file_name,connection_instance,container_name,manifest_template):
    try:
        local_path = "./"
        upload_file_path = os.path.join(local_path, local_file_name)
        with open(upload_file_path, 'wb') as _f:
            plistlib.dump(manifest_template, _f)
        blob_service_client = BlobServiceClient.from_connection_string(azure_connection_string)
        blob_client = blob_service_client.get_blob_client(container=container_name + "/manifests", blob=local_file_name)
        with open(upload_file_path, "rb") as data:
            blob_client.upload_blob(data)
        os.remove(upload_file_path)

    except Exception as ex:
        print ("Error: " + str(ex))
This function will get the groups the device is a member of and add an included manifest for a "department" if group membership is found.
def get_device_memberOf(azureADDeviceId):
    q_param_device = {"$filter":"deviceId eq " + "'" + azureADDeviceId + "'"}
    device_object = makeapirequest(device_group_endpoint,token,q_param_device)
    for id in device_object['value']:
        objId = id['id']
        aad_device_objId = objId
    q_param_group= {"$select":"id"}
    memberOf = makeapirequest(device_group_endpoint + "/" + aad_device_objId + "/memberOf",token,q_param_group)
    device_groups = []
    for group_id in memberOf['value']:
        id = group_id['id']
        device_groups.append(id)
    for k in department_groups.keys():
        values = department_groups.get(k)
        if values['id'] in device_groups:
            print("Device " + data['value'][i]['serialNumber'] + " found in group for " + values['name'] + ", adding included manifest for department")
            manifest_list.append(values['name'])
All the parameters, lists and dictionaries used. Let's start with the "department" piece. The idea behind this is to be able to add included manifests to devices based on group membership in Azure AD. If you have "department" manifests in munki, you can add the Azure AD group ID and manifest name of those in the dictionary below, if left blank only "site_default" will be added. To include additional "departments", just add them to the dictionary with the same format.
department_groups = {
    "Department1": {
        "id": "{AZURE AD GORUP ID}",
        "name": "{NAME OF EXISTING MANIFEST}"
    },
    "Department2": {
        "id": "{AZURE AD GORUP ID}",
        "name": "{NAME OF EXISTING MANIFEST}"
    }
}
Required parameters to update are the following, add info from your environment:
- tenantname = ""
- clientid = "" (from app registration)
- clientsecret = "" (from app registration)
- azure_connection_string = ""
- container_name = "munki" (if your private container is not named munki)
#Create dicts and objects
devices = []
manifest_dict = {}
catalogs = ["Production"]
department_groups = {
    "Department1": {
        "id": "",
        "name": ""
    },
    "Department2": {
        "id": "",
        "name":""
    }
}

#Set Graph parameters
tenantname = ""
resource = ""
endpoint = ""
group_endpoint = ""
device_group_endpoint = ""
clientid = ""
clientsecret = ""
q_param = {"$filter":"operatingSystem eq 'macOS'"}

#Set Azure Storage parameters
azure_connection_string = ""
container_name = "munki"
blob_path = "manifests/"
This block connects to Azure Storage and gets all blobs in the container and adds them to the list current_manifests.
connection_instance = azure_connect_conn_string(azure_connection_string, container_name)
container_content_list(connection_instance, blob_path)
Gets access token and all macOS devices in MEM.
token = obtain_accesstoken(tenantname,clientid,clientsecret,resource)
data = makeapirequest(endpoint,token,q_param)
Loops through all devices from the device Graph request, creates a dictionary, adds values for each device and appends to devices list.
for i in range(0, len(data['value'])):
    manifest_list = ["site_default"]
    client_dict = {}
    client_dict['deviceName'] = data['value'][i]['deviceName']
    client_dict['serialNumber'] = data['value'][i]['serialNumber']
    client_dict['user'] = data['value'][i]['userPrincipalName']
    client_dict['id'] = data['value'][i]['azureADDeviceId']
    get_device_memberOf(data['value'][i]['azureADDeviceId'])
    client_dict['manifest_list'] = manifest_list
    devices.append(client_dict)
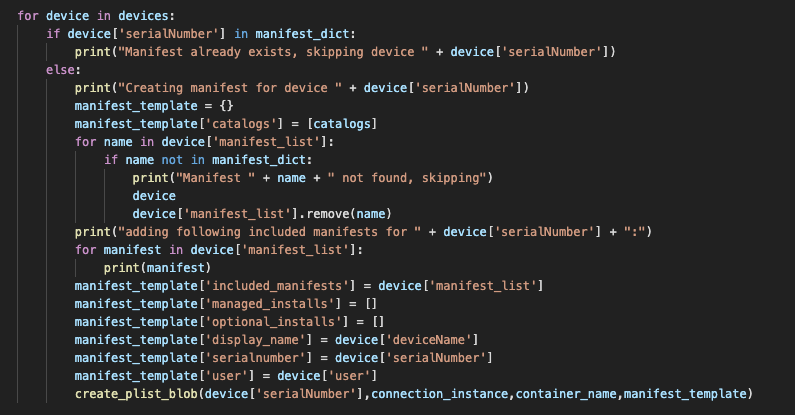
Loop through in the devices list, if a manifest for the device exists it's skipped. If not go ahead and create a manifest, by default a Production catalog is added, if the device is a member of a department group an included manifest for that department is added, if the device is not a member only the site_default manifest is included. manifest_template is our .plist data, the last line creates the manifest with name of the devices serial number.
for device in devices:
    if device['serialNumber'] in manifest_dict:
        print("Manifest already exists, skipping device " + device['serialNumber'])
    else:
        print("Creating manifest for device " + device['serialNumber'])
        manifest_template = {}
        manifest_template['catalogs'] = [catalogs]
        for name in device['manifest_list']:
            if name not in manifest_dict:
                print("Manifest " + name + " not found, skipping")
                device
                device['manifest_list'].remove(name)
        print("adding following included manifests for " + device['serialNumber'] + ":")
        for manifest in device['manifest_list']:
            print(manifest)
        manifest_template['included_manifests'] = device['manifest_list']
        manifest_template['managed_installs'] = []
        manifest_template['optional_installs'] = []
        manifest_template['display_name'] = device['deviceName']
        manifest_template['serialnumber'] = device['serialNumber']
        manifest_template['user'] = device['user']
        create_plist_blob(device['serialNumber'],connection_instance,container_name,manifest_template)
Setup
To be able to use this script we need to setup an app registration in Azure AD and grant permissions to Graph and get the connection string from the Azure Storage Account.
Azure AD app registration
- Sign in to Azure portal
- Navigate to Azure Active Directory -> App registrations and click on New registration
- Provide a Name and click Register
- Note the Application (client) id
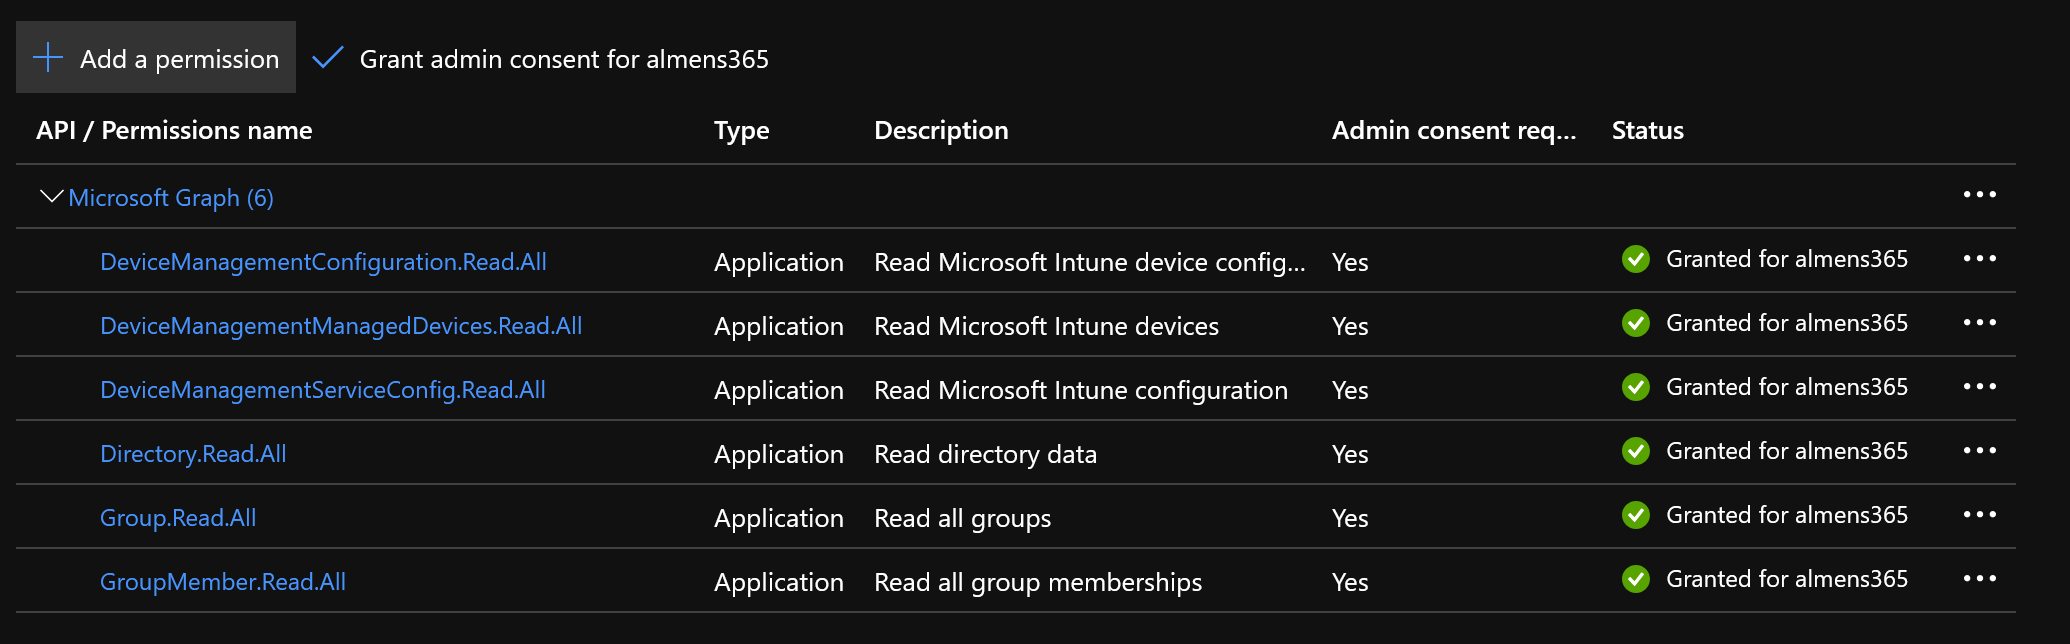
- Nvigate to API permissions and click Add permission and choose Microsoft Graph, add the following app permissions:
- DeviceManagementConfiguration.Read.All
- DeviceManagementManagedDevices.Read.All
- DeviceManagementServiceConfig.Read.All
- Directory.Read.All
- Group.Read.All
- GroupMember.Read.All
- Click Grant admin consent for {tenantname}
- Navigate to Certificates and secrets, click New client secret, provide a Name choose Expiry date then click Add. Note the secret value as we'll need it
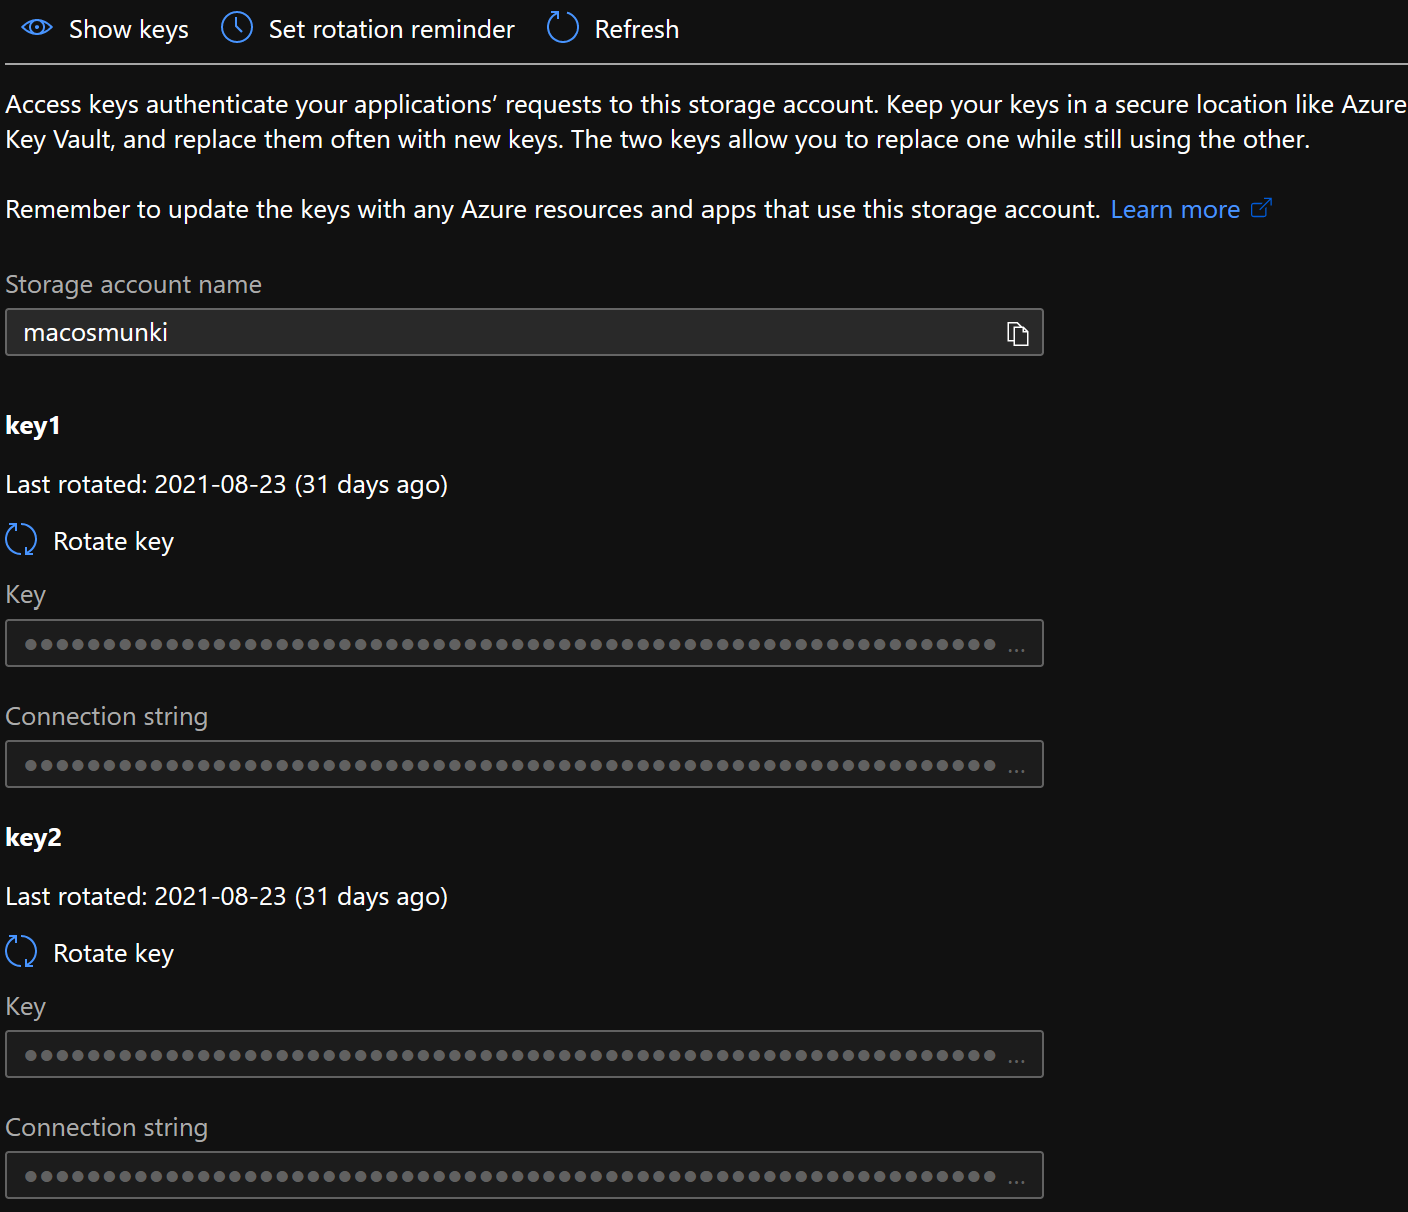
Storage Account connection string
- In the Azure portal, navigate to Storage accounts, click on the storage account that houses your Munki repo, click on Access keys in the menu and note your Connection string
Azure Automation
Finally we can setup our python runbook, now, you don't have to use Azure automation, I just think it's easy to setup and want it to run on a schedule.
- Open Automation accounts and click on the Automation account you want to use or create a new one
- Download the following Python packages in the .whl format
- On your Automation Account, navigate to Python packages -> Python 3 packages (preview) and add the packages downloaded in the previous step
- Navigate to Runbooks, click Create a runbook, provide a Name, choose Python 3 as runbook type, then click Create
- Copy the script from my GitHub
- Paste the script in the runbook
- Save the runbook
Now when you run the runbook, you'll get the following output,
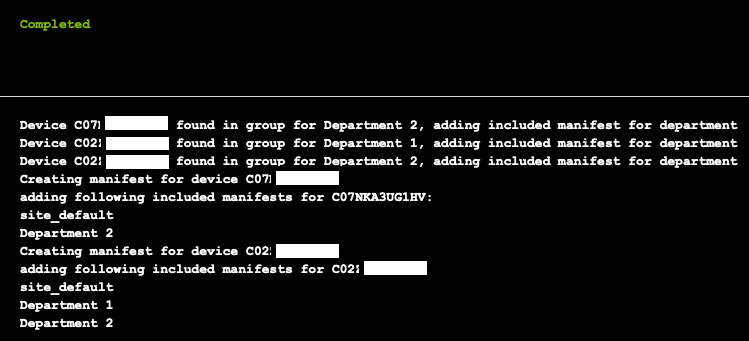
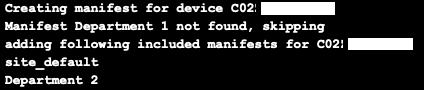
If a manifest you specified in department_groups don't exist it will be skipped,
Manifests uploaded to Azure Storage Munki repo,

Content of device manifest,
<?xml version="1.0" encoding="UTF-8"?>
<!DOCTYPE plist PUBLIC "-//Apple//DTD PLIST 1.0//EN" "http://www.apple.com/DTDs/PropertyList-1.0.dtd">
<plist version="1.0">
<dict>
	<key>catalogs</key>
	<array>
		<string>Production</string>
	</array>
	<key>display_name</key>
	<string>tobias’s Mac mini</string>
	<key>included_manifests</key>
	<array>
		<string>site_default</string>
		<string>Department 2</string>
	</array>
	<key>managed_installs</key>
	<array/>
	<key>optional_installs</key>
	<array/>
	<key>serialnumber</key>
	<string>C07XXXXXXXXX</string>
	<key>user</key>
	<string>almen@almens365.onmicrosoft.com</string>
</dict>
</plist>
That's it, have fun generating device manifests for devices!