

In today's fast-paced digital landscape, efficient management of applications is crucial for ensuring the smooth operation of organizations. However, alongside this efficiency, security remains paramount. As technology evolves, so do the methods employed by malicious actors to exploit vulnerabilities in applications and systems.
Implementing robust security measures is essential to safeguard sensitive data, protect against cyber threats, and maintain the trust of customers and stakeholders. This includes regularly updating software.
Microsoft Intune offers a platform for managing macOS apps, but the process of creating, updating, promoting, and deleting these apps can be time-consuming and complex. However, with the Intune AutoPkg Tools repository, managing macOS apps in Intune becomes a breeze.
Automating Intune App Management
The Intune AutoPkg Tools repository houses a script that acts as a wrapper around AutoPkg, a popular tool for automating the packaging and deployment of macOS applications. This script streamlines the entire process of managing macOS apps in Intune, from creation to deletion, using the Intune Uploader set of AutoPkg custom processors.
Getting Started
For those new to Intune Uploader, the repository's wiki provides comprehensive guidance on getting started with the processor.
How It Works
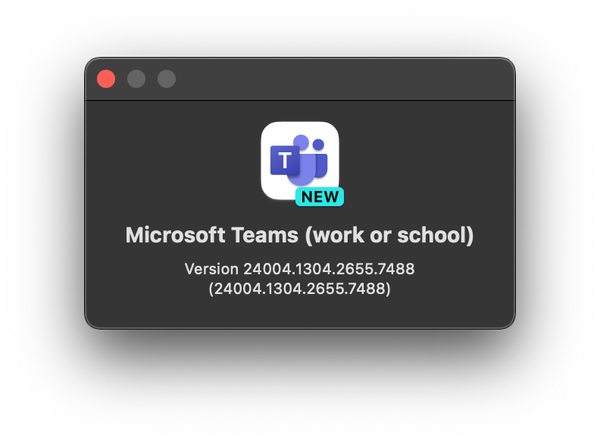
The heart of the Intune AutoPkg Tools repository lies in its script, autopkg_tools.py, which orchestrates the entire process. This script utilizes a list of overrides for applications to manage, this repository contains two examples, one for Firefox and one for UTM. Adding additional overrides for other apps you want to manage is as easy as creating a new override using AutoPkg.
The repository includes three key JSON files:
autopkg_tools/recipe_list.json- List of recipes to runautopkg_tools/promote_list.json- List of recipes to promote to groups in stages, see here for more information on how to configure this.autopkg_tools/cleanup_list.json- List of recipes to delete old versions in Intune, when adding a new version, configure thekeepvalue to the number of versions to keep. If not configured, the default is 3.
Integration with CI/CD Pipelines
Whether you prefer GitHub Actions or Azure Pipelines, integrating Intune AutoPkg Tools into your CI/CD workflow is simple and straightforward.
In this post the focus is on GitHub Actions and Azure Pipelines, however, this script can be run on any macOS agent.
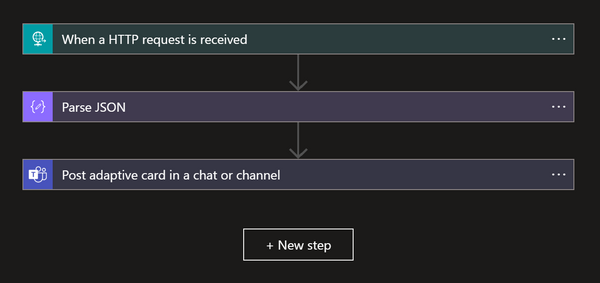
Teams notifications
If you configure a webhook to a Teams channel, status messages from the CI/CD run will be sent to Teams so you can get information about when a application was updated, promoted or removed.
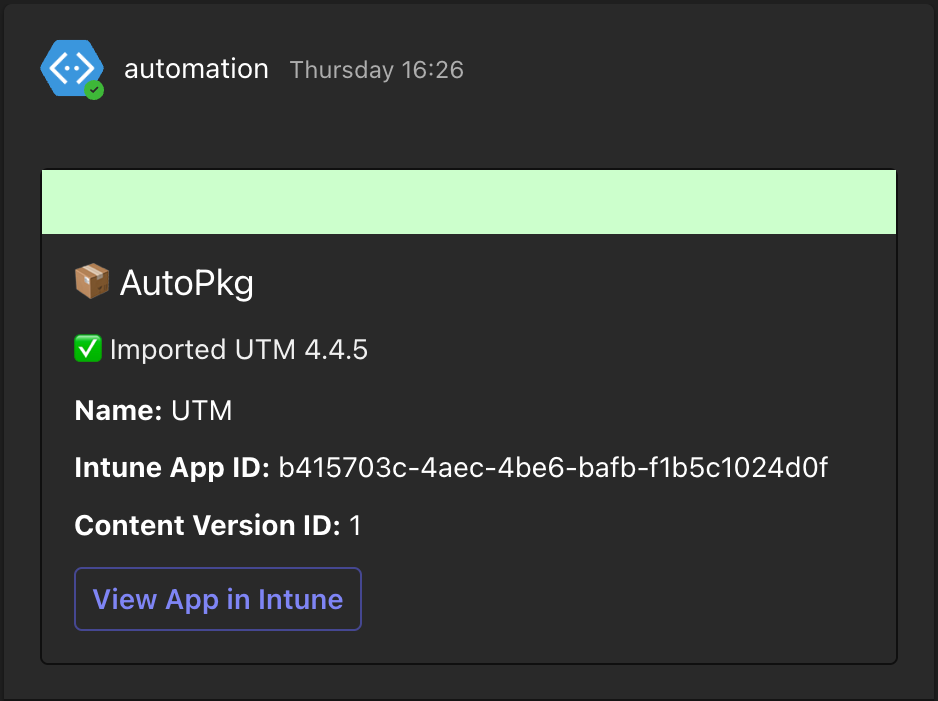
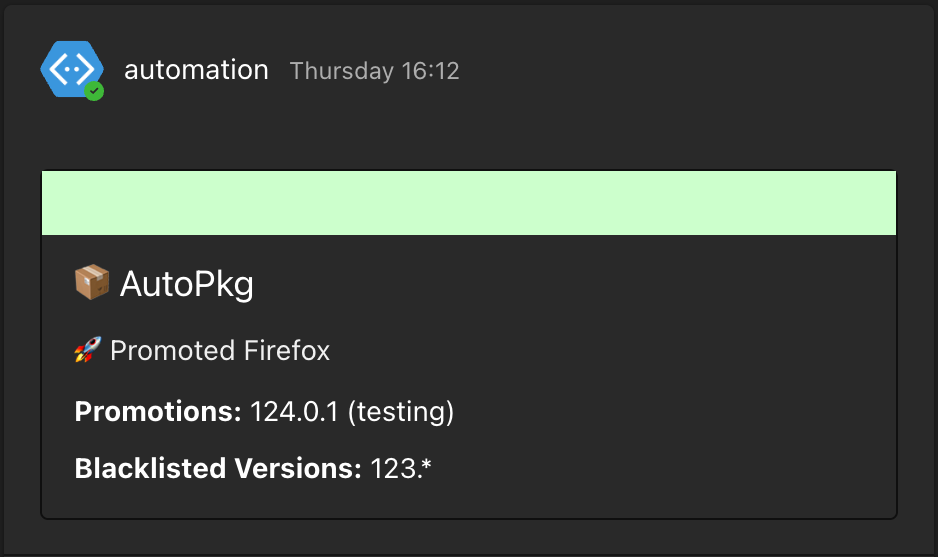
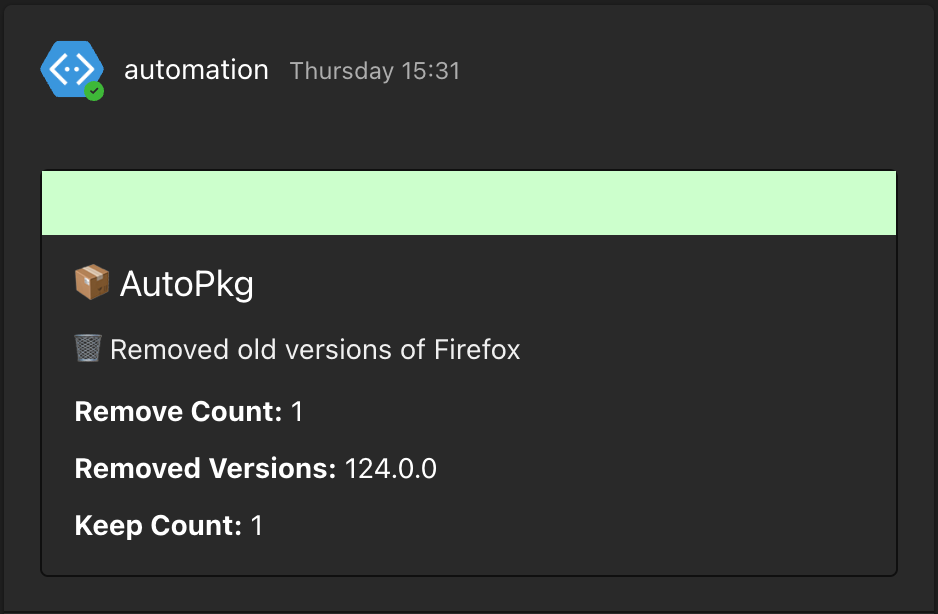
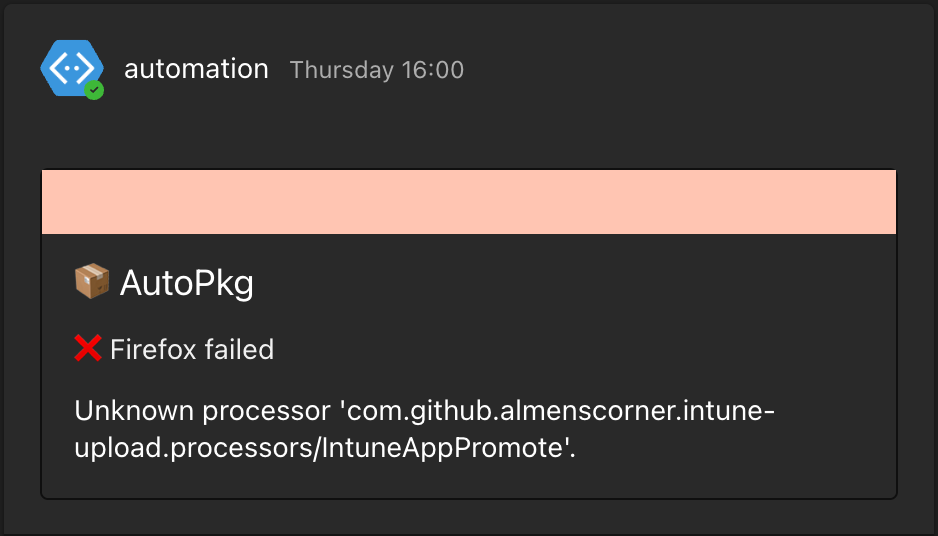
Teams notifications
Preparation:
Clone the repo
- Open your terminal or command prompt.
- Navigate to the directory where you want to clone the repository.
- Use the
git clonecommand followed by the URL of the Intune AutoPkg Tools URL:
git clone https://github.com/almenscorner/intune-autopkg-tools
Create Teams webhook (optional)
- Navigate to the channel where you want to add the webhook.
- Click on the ellipsis (...) next to the channel name and Select "Manage Channel."
- Click "Edit" on Connectors.
- In the connectors list, find "Incoming Webhook" and click "Configure."
- Give your webhook a name and (optionally) upload an image to represent it.
- Click "Create" or "Add."
- After the webhook is created, you'll be provided with a unique URL. This URL is what you'll use to send messages to the channel. Save this URL for later use.
- You can configure additional options like specifying a custom name for the bot posting messages, choosing an icon, etc. This depends on your requirements.
- Once you've copied the webhook URL and configured any additional options, save your settings.
For GitHub Actions:
Step 1: Create a New Private Repository
- Log in to your GitHub account.
- In the upper-right corner of any page, click the "+" icon, then select "New repository" from the dropdown menu.
- On the "Create a new repository" page, enter a name for your repository. Optionally, add a description for your repository.
- Select "Private" as the visibility level for your repository.
- Choose whether to initialize the repository with a README file, add a .gitignore, and choose a license. This is optional.
- Click the "Create repository" button.
Step 2: Clone Your Private Repository
- Once your private repository is created, click the "Code" button to get the repository's URL.
- In your terminal or command prompt, navigate to the directory where you want to clone your repository.
- Use the following command to clone your repository, replace
<repository_URL>with the URL of your private repository:
git clone <repository_URL>
- Copy the contents of the cloned
intune-autopkg-toolsrepository to your repository.
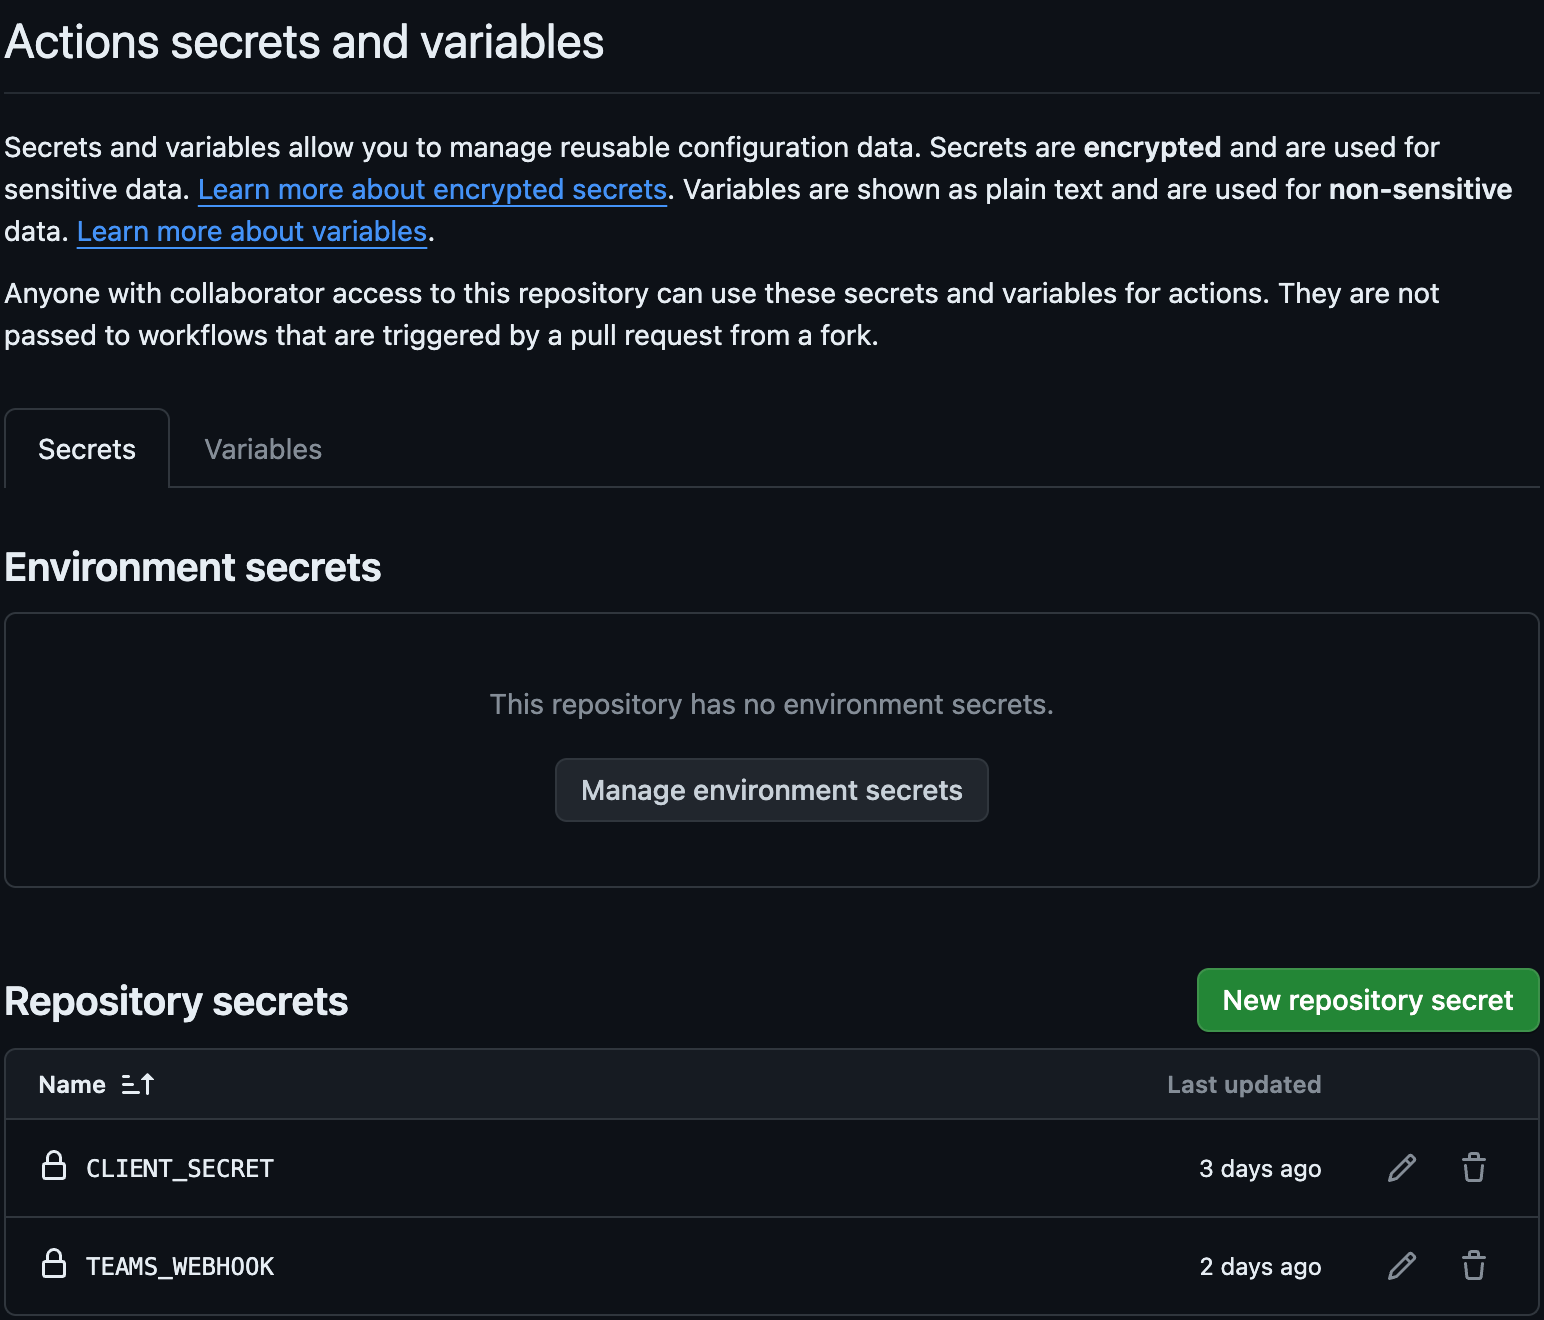
Step 3: Add Secret Action Variables
- Go to the "Settings" tab of your repository.
- In the left sidebar, click on "Secrets and variables" and then "Actions".
- Click on the "New repository secret" button.
- Add the following secrets to your repository:
CLIENT_SECRETTEAMS_WEBHOOK(optional)
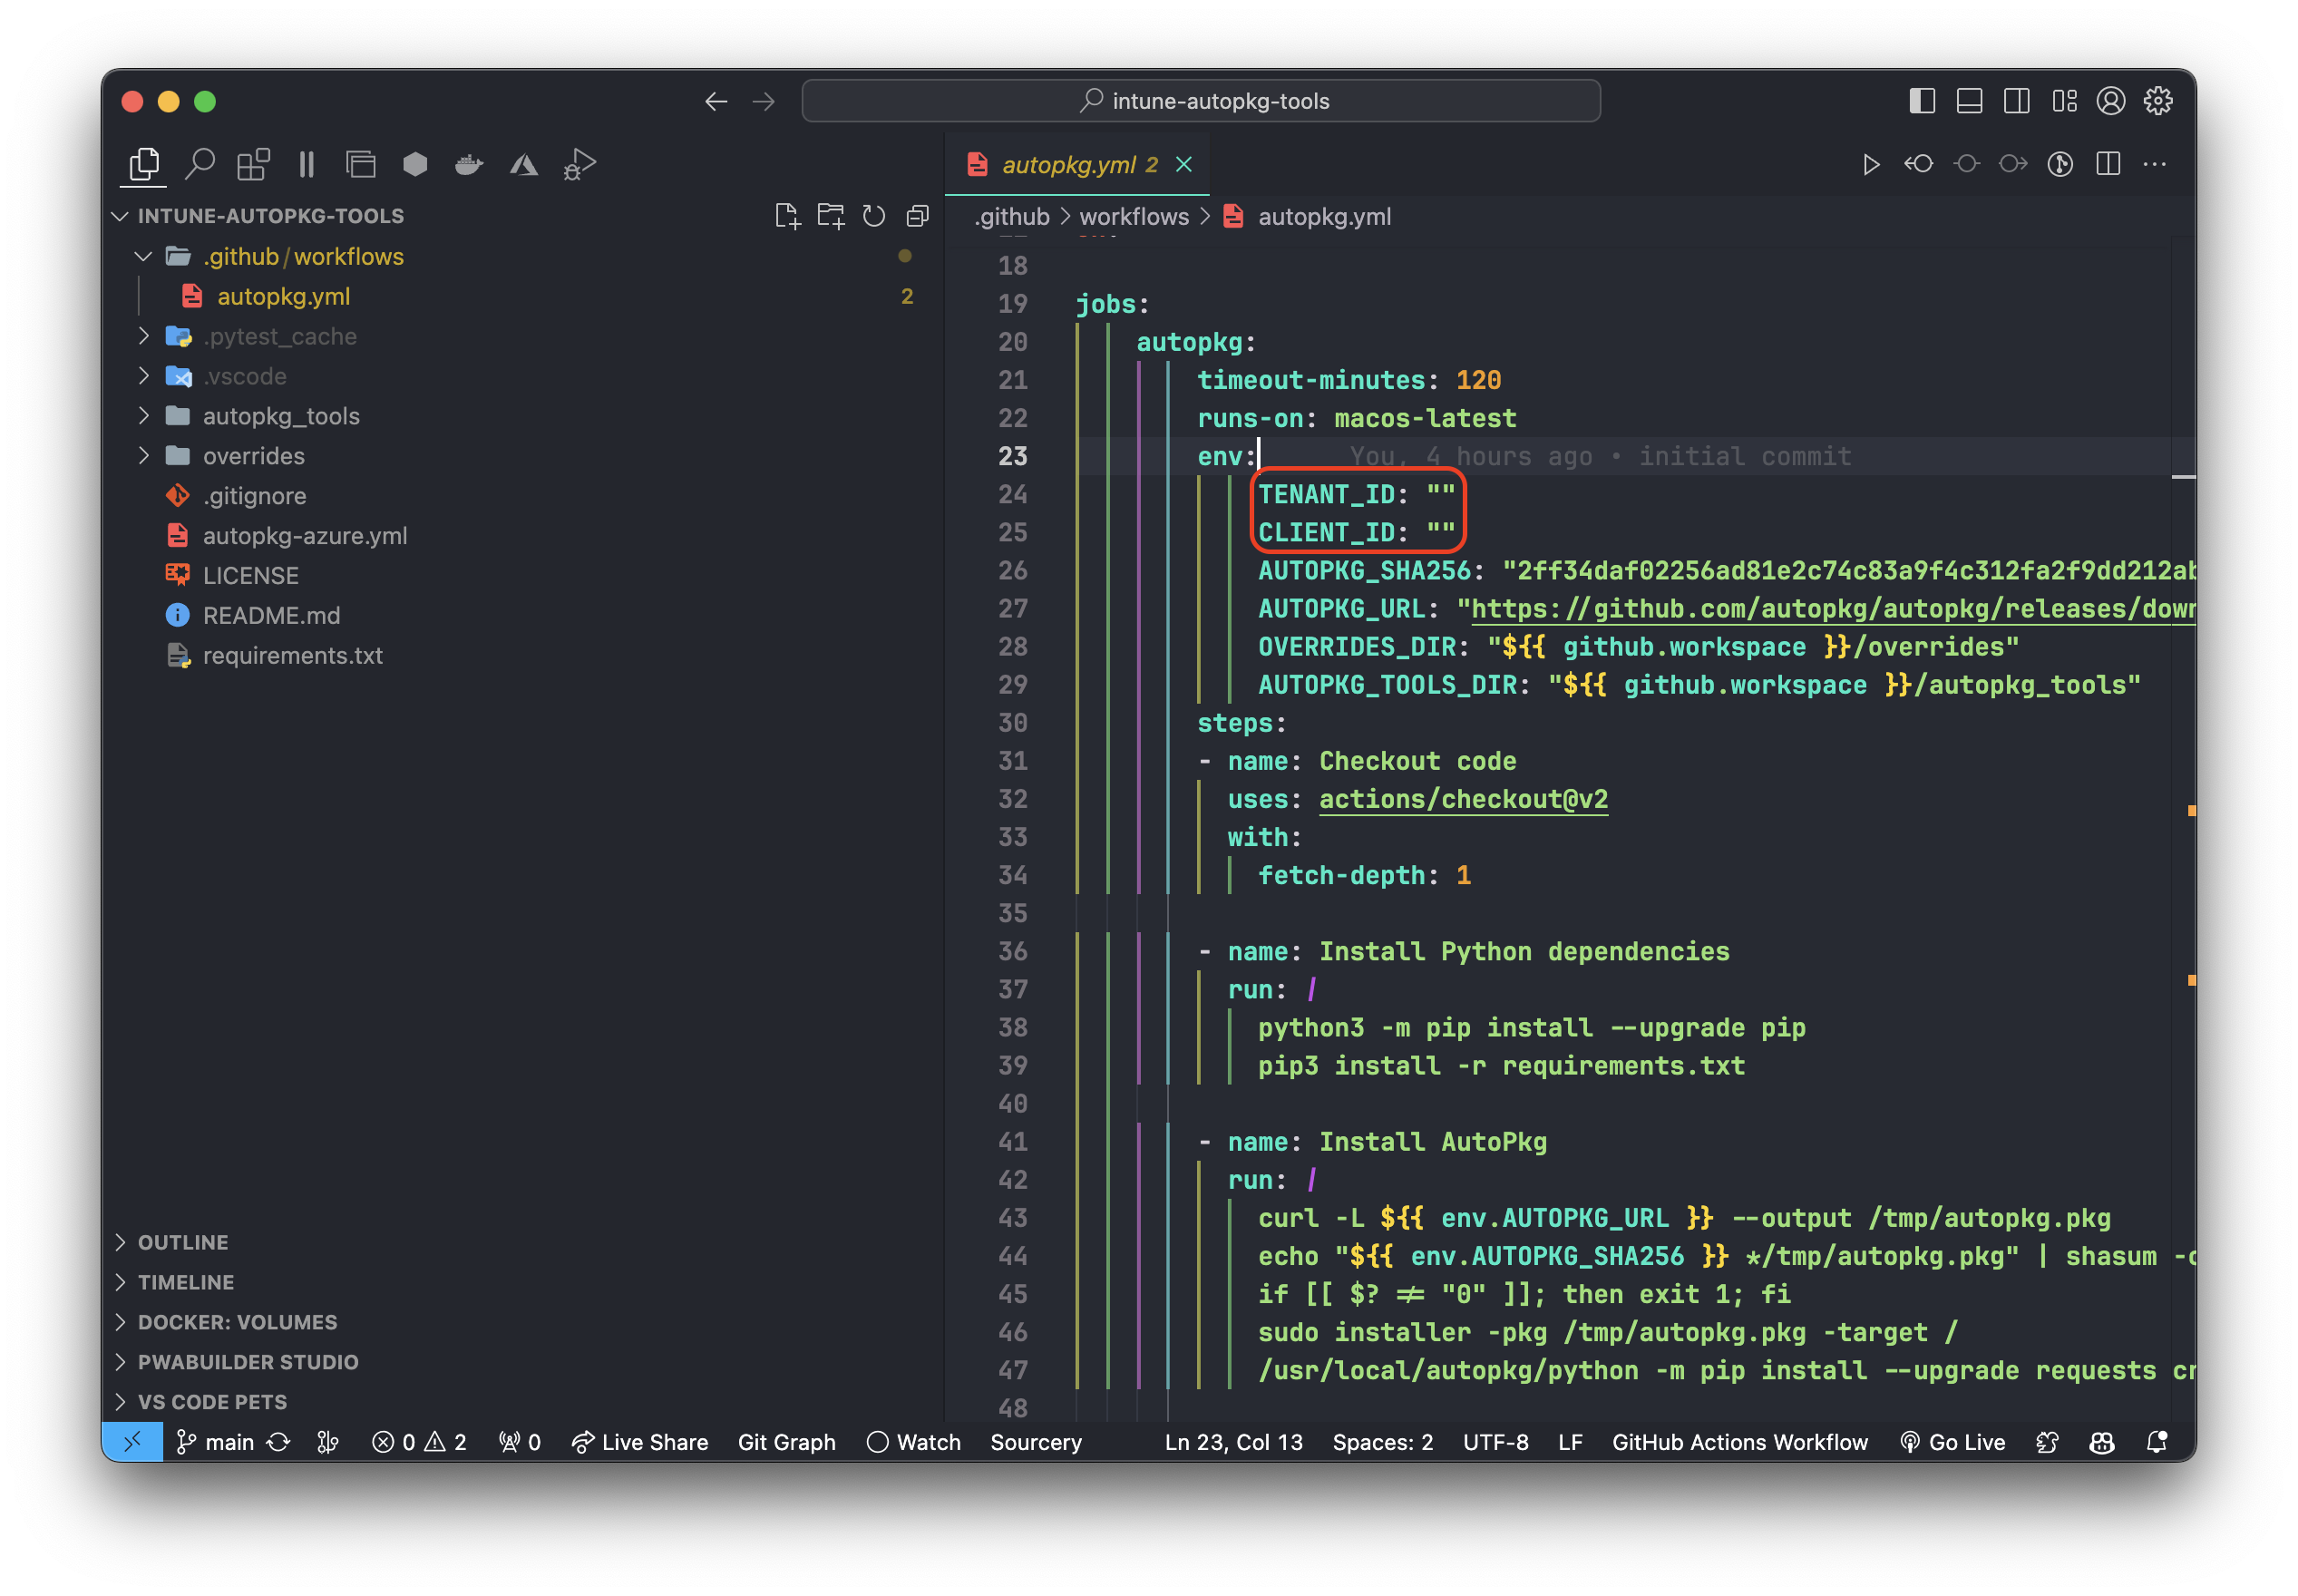
Step 4: Update the action variables
- Open up the
autopkg.ymlfile in a text editor and update variablesTENANT_IDandCLIENT_IDin the.github/workflows/autopkg.ymlfile to match your Entra ID settings.
Step 5: Commit and Push Changes
- Use the following commands to commit and push your changes to your private repository:
git add .
git commit -m "initial commit"
git push
That's it! You've successfully created a private repository on GitHub and added secret action variables for use in your GitHub Actions workflows.
Step 6: Update or add overrides
- As mentioned there are two overrides provided as an example, Firefox and UTM. Firefox contains information to use the promotion feature, either add group IDs and modify as needed or remove the promotion information from the override as well as the
promote_list.json. If you have any other applications you want to include, create and add overrides for these. Firefox is also added tocleanup_list.jsonto remove old versions as updates are uploaded.
For Azure Pipelines:
Step 1: Create a new project
- In the "Projects" section, locate and click on the "New project" button. It's usually positioned in the top-right corner of the screen.
- Enter Project Details:
- Project Name: Enter a name for your project. Choose a descriptive name that reflects the purpose or nature of your project.
- Visibility: Choose Private
- Description (Optional): Optionally, you can add a description to provide more context about your project.
- Click the "Create" button to create the project.
Step 2: Clone Your Private Repository
- Once your private repository is created, click on it to open it.
- Click on the "Clone" button to copy the repository URL.
- In your terminal or command prompt, navigate to the directory where you want to clone your repository.
- Use the following command to clone your repository, replace
<repository_URL>with the URL of your private repository:
git clone <repository_URL>
- Copy the contents of the cloned
intune-autopkg-toolsrepository to your repository.
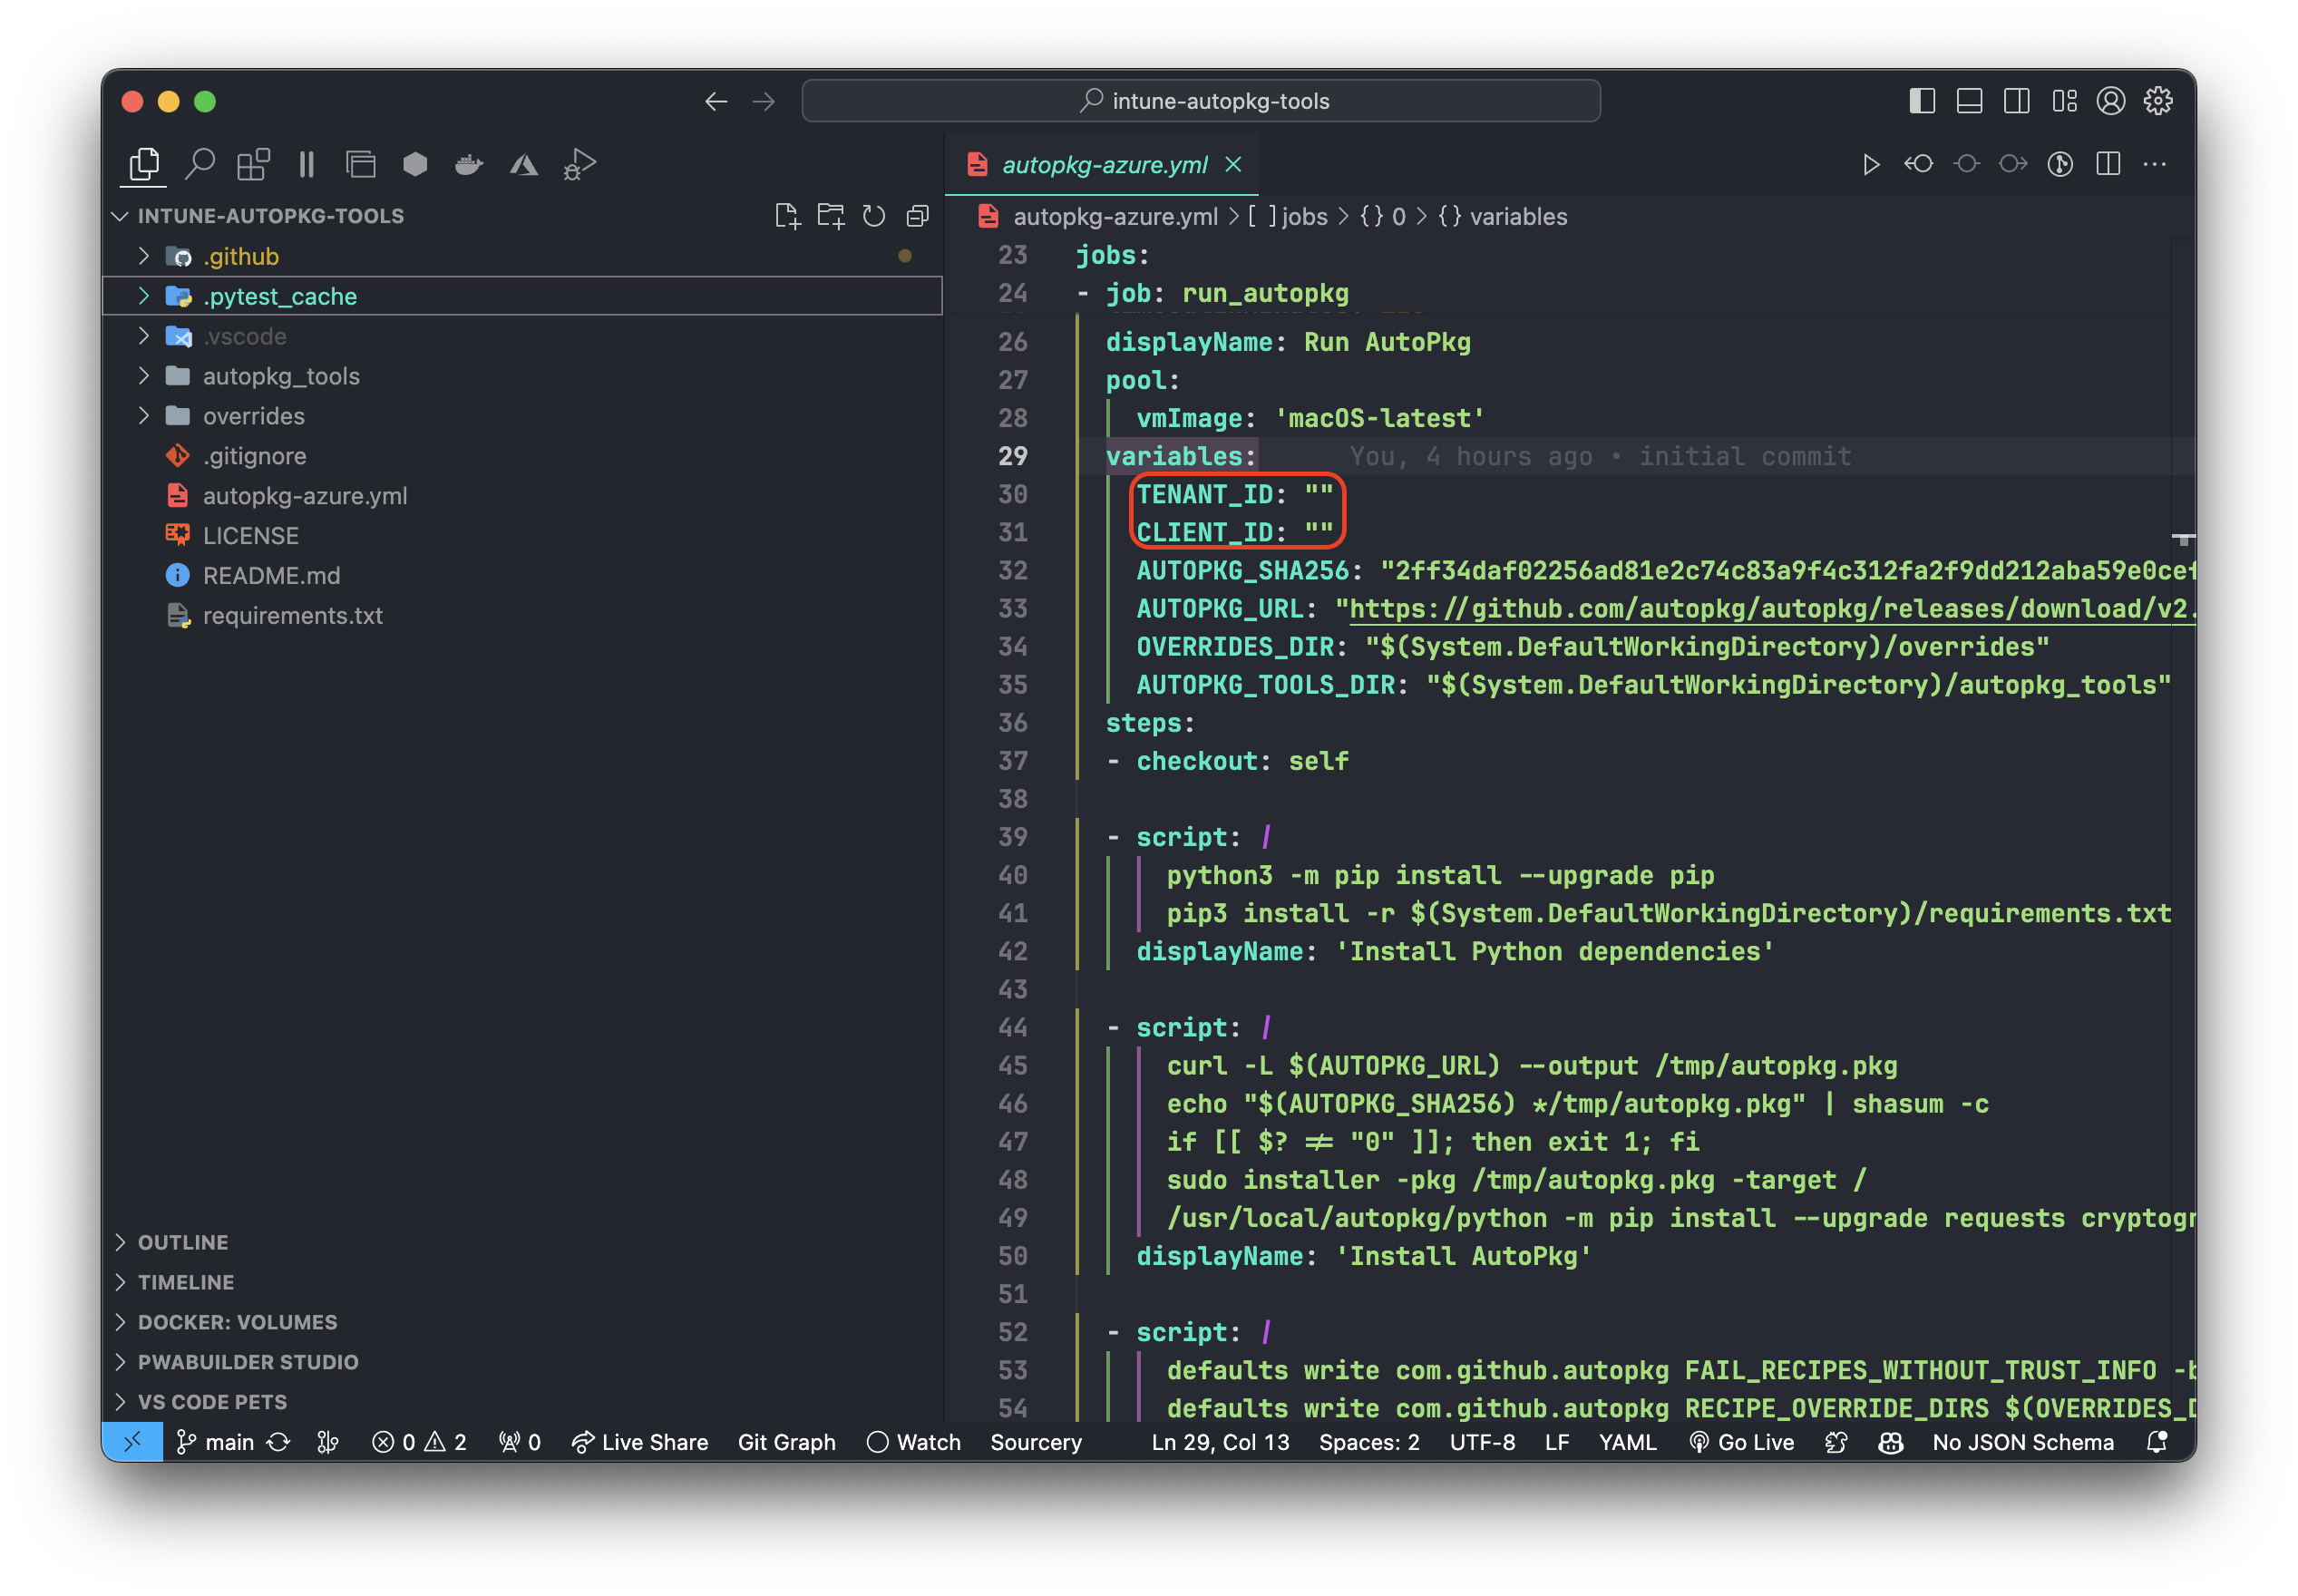
Step 3: Update the pipeline variables
- Open up the
autopkg-azure.ymlfile in either a text editor and update variablesTENANT_IDandCLIENT_IDin theautopkg-azure.ymlfile to match your Entra ID settings.
Step 5: Commit and Push Changes
- Use the following commands to commit and push your changes to your private repository:
git add .
git commit -m "initial commit"
git push
Step 6: Create the Pipeline
- Click on the "Pipelines" menu item in the left sidebar.
- In the Pipelines page, click on the "New pipeline" button. This button is usually located at the top right corner of the page.
- Azure DevOps will prompt you to choose the location of your source code. Select the Azure Repos Git.
- Azure DevOps will analyze your repository and provide you with options for pipeline configuration. Since you want to create a pipeline from an existing file, select the option that says "Existing Azure Pipelines YAML file."
- Click on the "Continue" button.
- In the next screen, Azure DevOps will ask you to specify the path to your existing pipeline YAML file. Click on the folder icon to browse for the file and select
autopkg-azure.yml.- Once you've selected the file, click on the "Continue" button.
- Click on the Variables button in the top right and add the following Secret Variables:
CLIENT_SECRETTEAMS_WEBHOOK(optional)
- Review and save your pipeline.
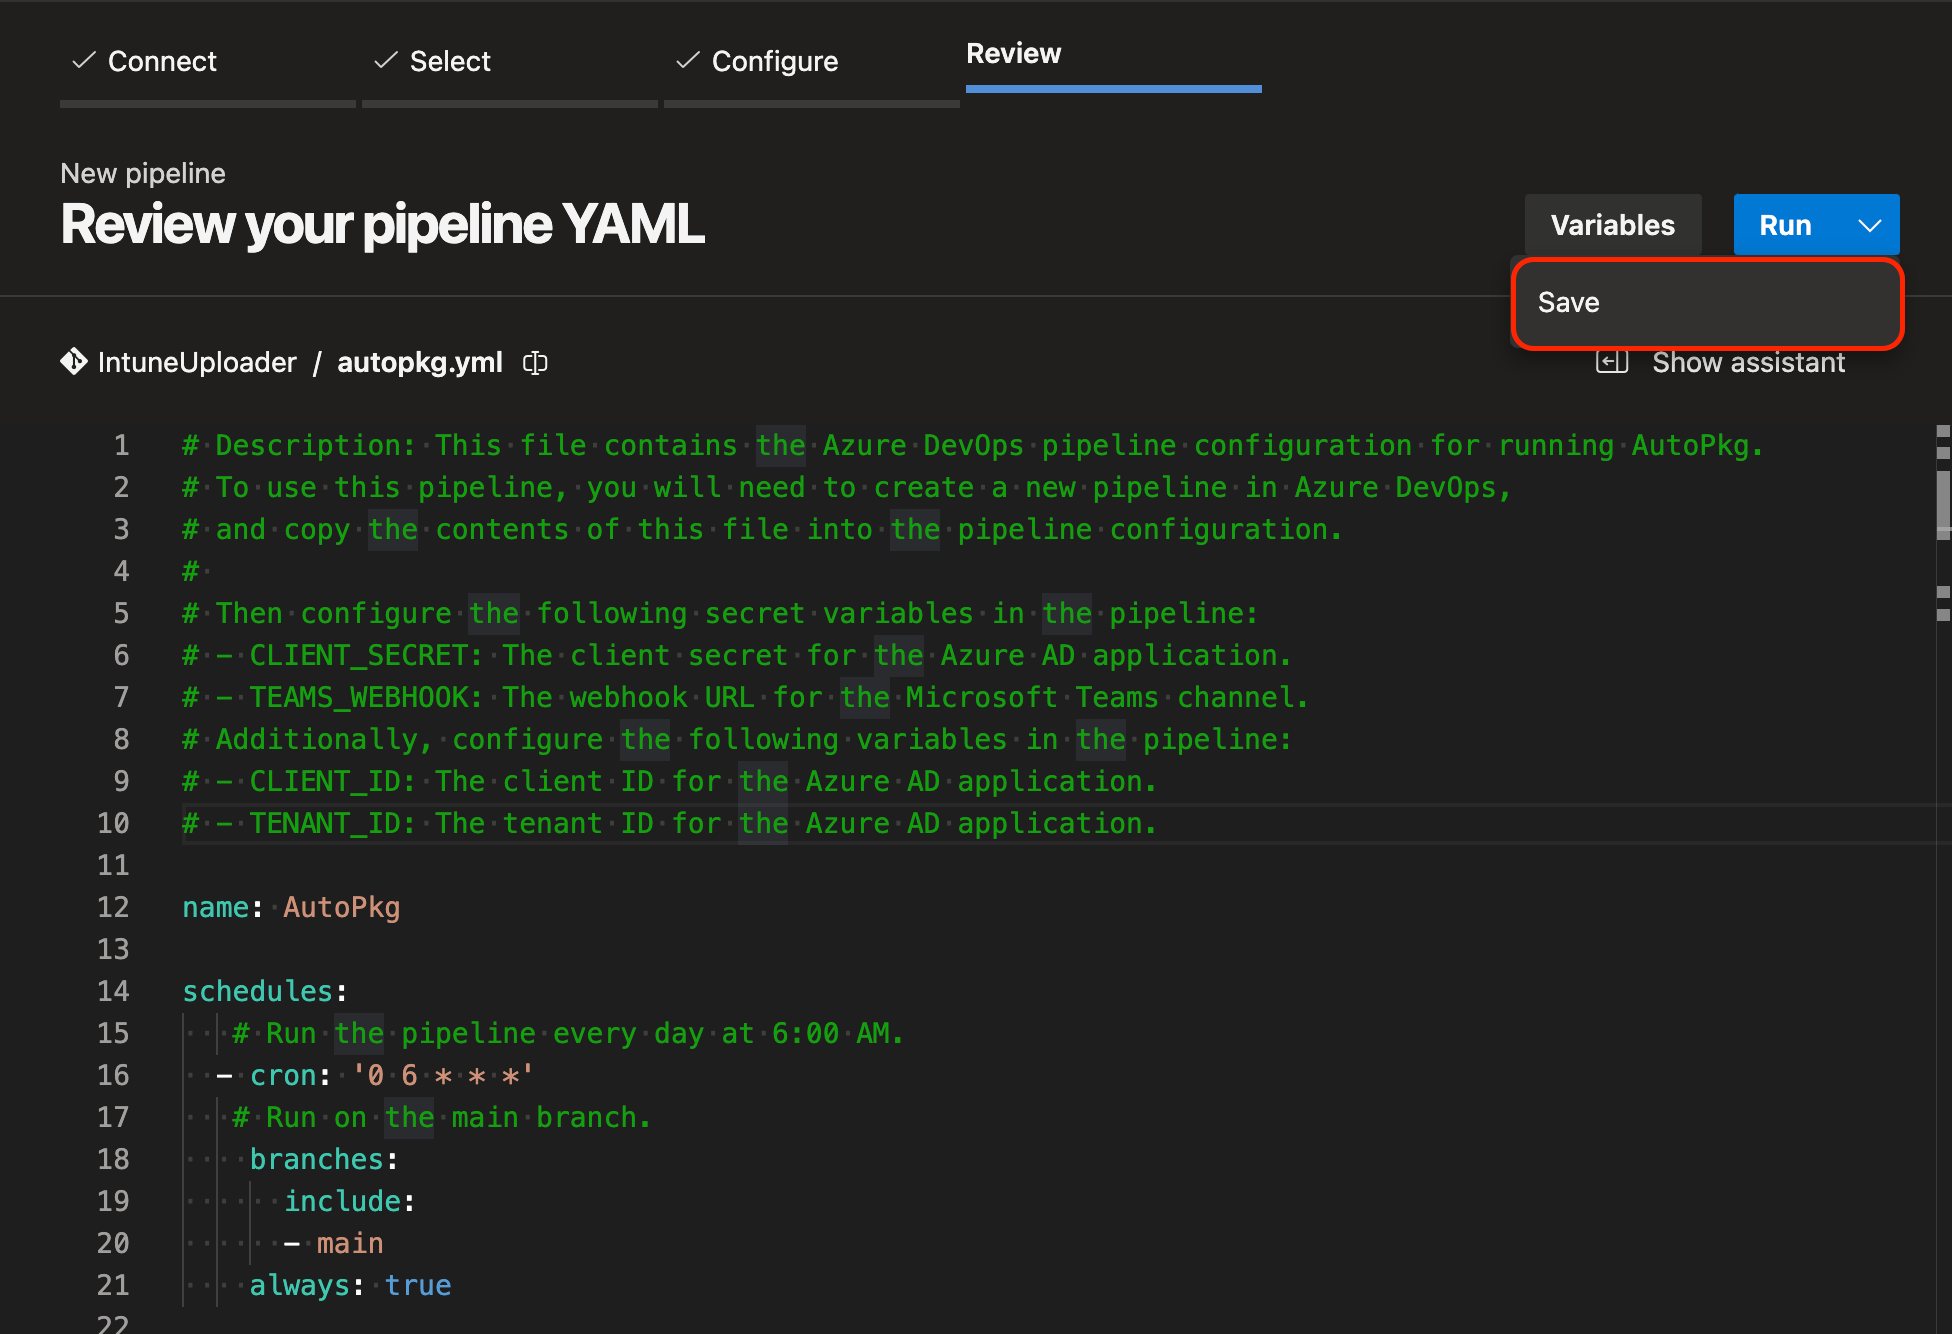
That's it! You've successfully created a private repository on Azure DevOps and added secret variables for use in your Pipeline.
Step 7: Update or add overrides
- As mentioned there are two overrides provided as an example, Firefox and UTM. Firefox contains information to use the promotion feature, either add group IDs and modify as needed or remove the promotion information from the override as well as the
promote_list.json. If you have any other applications you want to include, create and add overrides for these. Firefox is also added tocleanup_list.jsonto remove old versions as updates are uploaded.
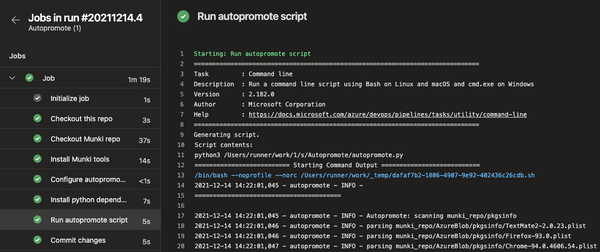
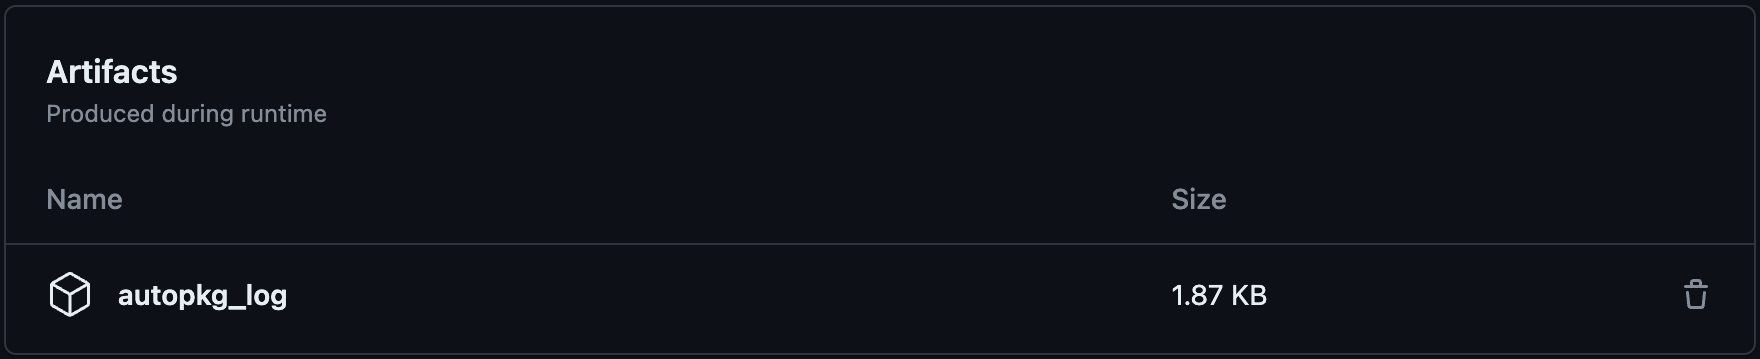
Logging
Each run from a GitHub action or Azure Pipeline will create an artifact with the logs as a zip. To review the logs you can just download the artifacts, unzip and review. If you require more verbose output for troubleshooting, add --debug to the parameters when executing the script in either autopkg.yml or autopkg-azure.yml.

Conclusion
Follow the steps above, you should now have a complete setup to run AutoPkg in a CI/CD workflow and automatically update and maintain your macOS apps in Intune.
The Intune AutoPkg Tools repository simplifies macOS app management in Intune, providing efficient automation for packaging, updating, promoting, and deleting apps. This automation streamlines workflows, allowing you to prioritize delivering value to your users.
Intune AutoPkg tools run