
Wow, it has been some time since I last posted something on the blog. I've been focusing all my time on developing tools like IntuneCD and IntuneCD front end but, today, it's time for a new post!
Some time ago I created a script to generate and update Munki manifests for macOS devices managed by Intune. It was based on Azure AD Device groups for adding included manifests and catalogs to device manifests.
Only being able to use device groups has it's drawbacks as you might be using user based groups to assign applications/configurations in a bigger scale. I have run into this myself using the manifest script in production over the last months.
Today, we are going to look at using the new and improved Munki Manifest Generator tool I released a few days ago in which you can target both device and user groups. This time it is created as a Python package instead of a script making it easy to install and get going.
Todays post will focus heavily on setting this package up to run on an Azure Automation Account.
Downloading the packages
Before we do anything in Azure, all required packages must first be downloaded. Download the following packages Build distribution (.whl)
Import packages to Azure Automation
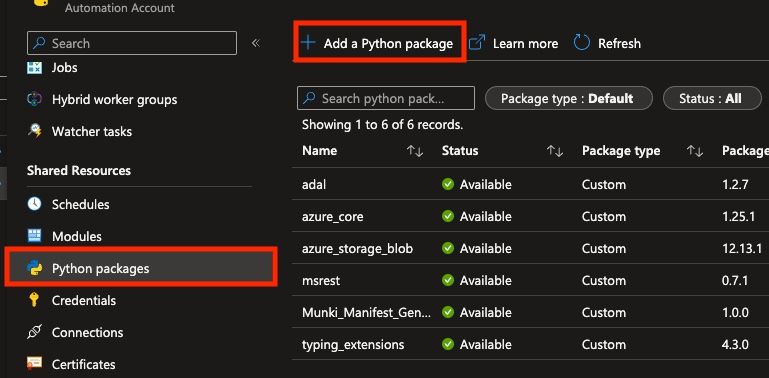
Now that all the required packages are downloaded, head over to Automation Accounts on Azure and open your existing account or create a new one.
- Navigate to Python packages in the left navigation menu and import each downloaded package. Runtime version needs to be 3.8.0
Create Azure AD App Registration
Since we are getting groups and the members of the groups and devices from Intune using Graph API, an App Registration needs to be created.
- Sign in to Azure portal
- Navigate to Azure Active Directory -> App registrations and click on New registration
- Provide a Name and click Register
- Note the Application (client) id
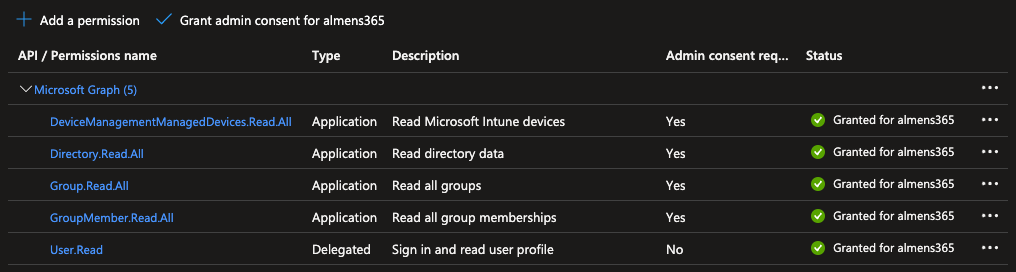
- Nvigate to API permissions and click Add permission and choose Microsoft Graph, add the following app permissions:
- DeviceManagementManagedDevices.Read.All
- Directory.Read.All
- GroupMember.Read.All
- Group.Read.All
- Click Grant admin consent for {tenantname}
- Navigate to Certificates and secrets, click New client secret, provide a Name choose Expiry date then click Add. Note the secret value as we'll need it
Storage Account Connection String
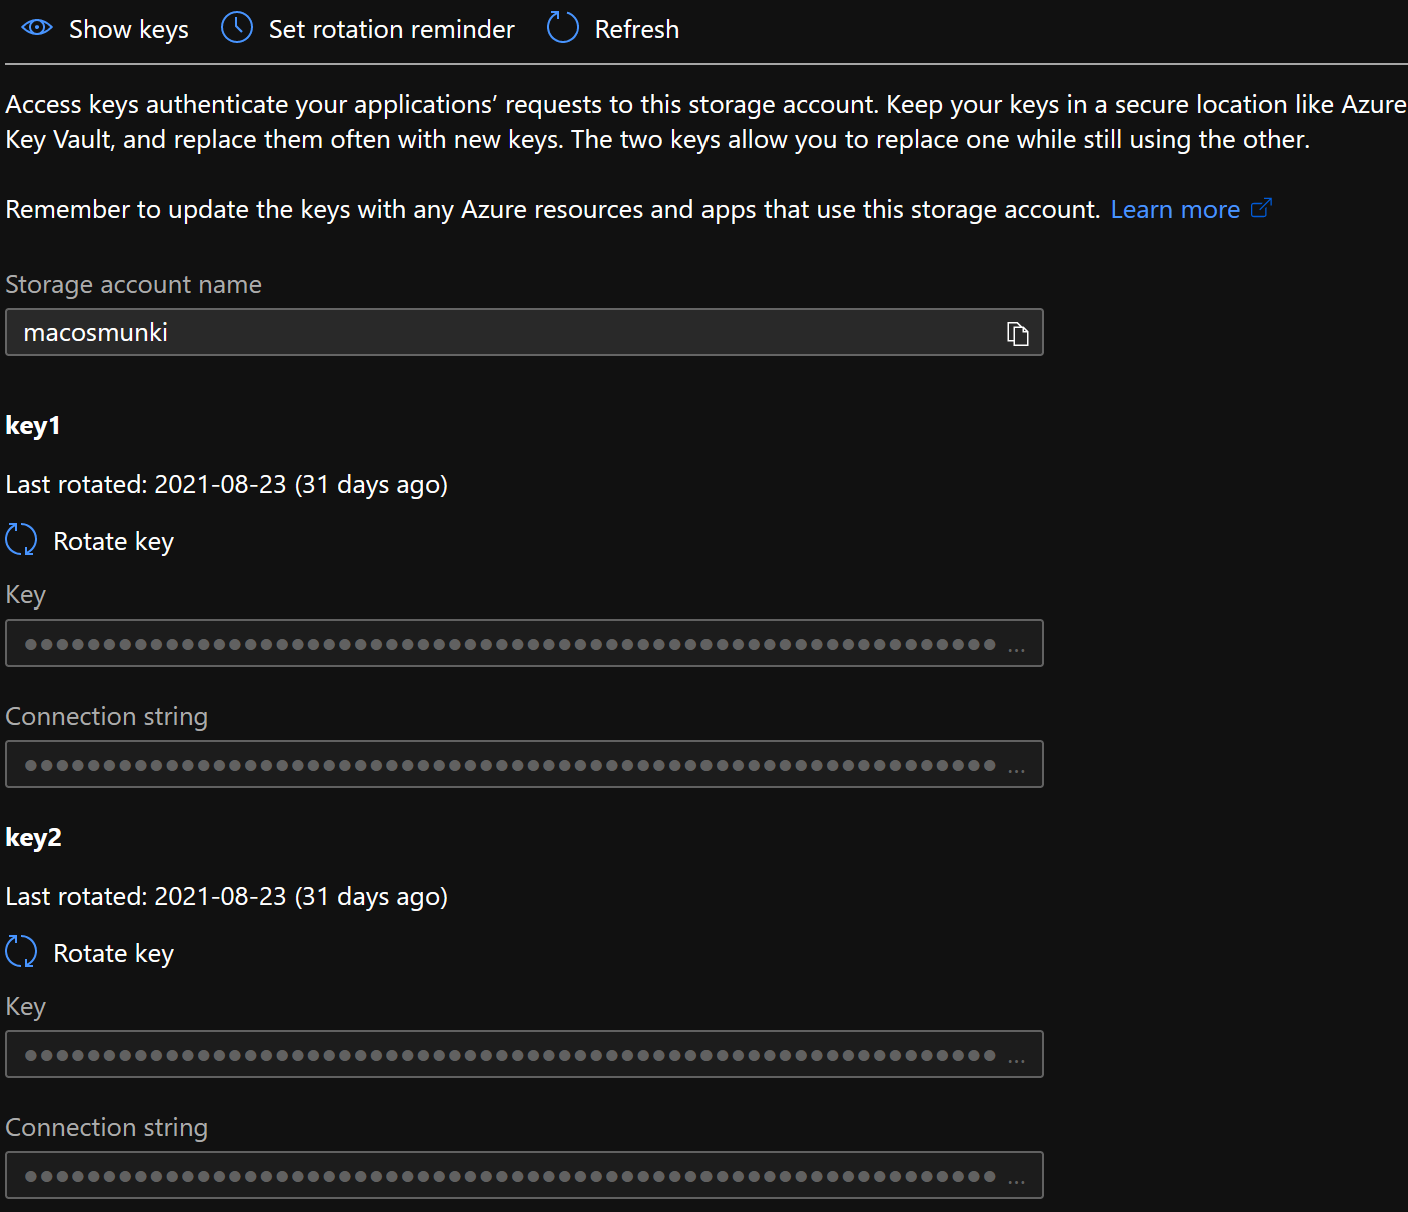
Next, the connection string to the storage account that hosts Munki will be needed. Follow the steps below to access and save the string.
- In the Azure portal, navigate to Storage accounts, click on the storage account that houses your Munki repo, click on Access keys in the menu and save your Connection string
Create variables
In the deprecated script, all connection variables was saved in the script which is not a secure option. This new package instead use environment variables so we can use them more securely. In Azure Automation we can use variables and get them from a runbook, sensitive variables can also be saved as encrypted values.
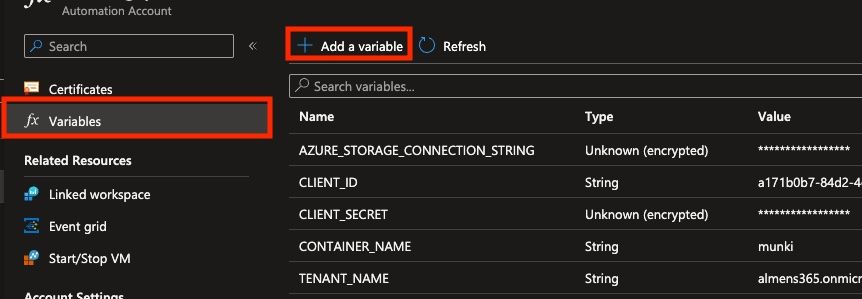
- Navigate to Variables in the left navigation menu on your Automation Account
- Click Add a variable and create the following
- AZURE_STORAGE_CONNECTION_STRING
- CLIENT_ID
- CLIENT_SECRET
- CONTAINER_NAME
- TENANT_NAME
As you can see here, I saved the storage connection string and the client secret as encrypted variables.
Create runbook
The building blocks to be able to run the package in a runbook are now in place. Now, let's create the runbook that will execute the script that will create and update manifests for devices.
- Navigate to Runbooks in the left navigation menu on your Automation Account and click Create a runbook
- Provide a Name and choose Python for runbook type and 3.8.0 for Runtime version
The script below is the same example as provided in the GitHub repo for this tool.
#!/usr/bin/env python3
from munki_manifest_generator import main as mmg

import os
import sys
import json
import automationassets
from automationassets import AutomationAssetNotFound

webhook = False
if len(sys.argv) > 1 :
    data = sys.argv[1].split(",")
    w_data = data[1].replace("RequestBody:","")
    #If executed from webhook, load json data and set webhook to True
    webhook_data = json.loads(w_data)
    webhook = True
    serial = webhook_data['serial']

# get  variables
os.environ['CLIENT_ID'] = automationassets.get_automation_variable("CLIENT_ID")
os.environ['CLIENT_SECRET'] = automationassets.get_automation_variable("CLIENT_SECRET")
os.environ['CONTAINER_NAME'] = automationassets.get_automation_variable("CONTAINER_NAME")
os.environ['AZURE_STORAGE_CONNECTION_STRING'] = automationassets.get_automation_variable("AZURE_STORAGE_CONNECTION_STRING")
os.environ['TENANT_NAME'] = automationassets.get_automation_variable("TENANT_NAME")


groups = [
    {
        "id": "id_of_aad_group", # id of the group in Azure AD
        "name": "name_of_manifest", # name of manifest in Munki
        "catalog": "catalog_name", # name of catalog in Munki or None
        "type": "type_of_group" # valid values are "user" or "device"
    },
        {
        "id": "id_of_aad_group_2", # id of the group in Azure AD
        "name": "name_of_manifest_2", # name of manifest in Munki
        "catalog": "catalog_name_2", # name of catalog in Munki or None
        "type": "type_of_group_2" # valid values are "user" or "device"
    }
]

if webhook is True:
	mmg.main(group_list=groups, serial_number=serial, test=True)
else:
	mmg.main(group_list=groups, test=True)
The name of the group and manifest in Munki must be the same. Let's say we have a group for Beta testers beta-users, then the name of the manifest in Munki should also be beta-users.
In this script, I have also enabled the -t argument which means that the tool will run in testing mode, providing full output but are not making any changes to the manifests on Azure Storage. This is useful to test that your groups list is accurate and that no manifests which should not be deleted are removed.
If you have manifests you do not want or need to specify in the groups list and do not want them removed, you can specify the -sm argument like this mmg.main(group_list=groups, test=True, safe_manifest="manifest1,manifest2"). site_default should not be specified anywhere, not in groups and not in safe_manifests.
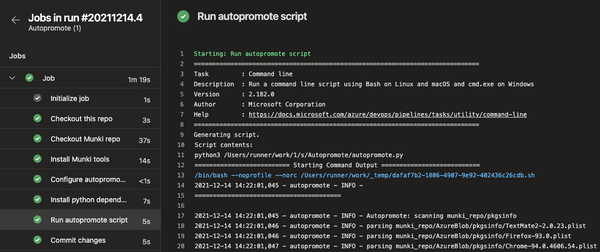
Once the script has been executed, you will see something similar to the below picture,
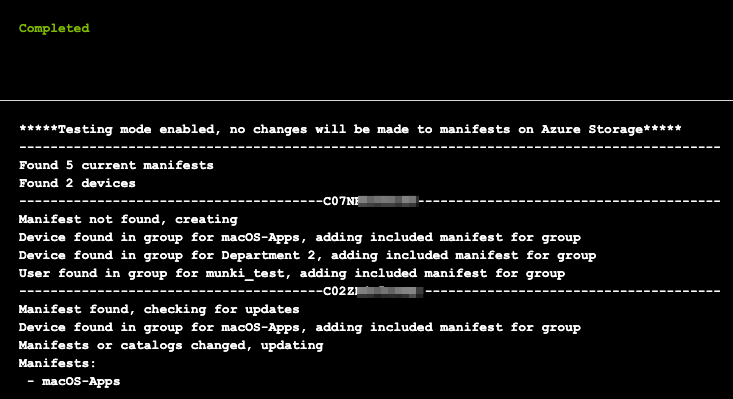
That's it, you have now deployed the tool to Azure Automation. You can connect a schedule to this runbook to have manifests generated and updated continuously so if device or user group membership changes, the Munki manifest for the device will change as well.
In addition to running the script on a schedule, I also have clients executing the script using a webhook using a custom attribute script. This enables devices to quickly create a manifest upon enrolling a new device.
The above runbook script is prepared to be executed from a webhook with a script like below,
#!/bin/bash

# Get device serial number
serial=$( ioreg -c IOPlatformExpertDevice -d 2 | awk -F\" '/IOPlatformSerialNumber/{print $(NF-1)}' )
# Set Azure Runbook webhook URL
webhook_url=

# Webhook JSON
json='{"serial":"'${serial}'"}'
# Send request
request=$( curl -X POST -H 'Content-type: application/json' --data $json $webhook_url )

if [[ $? -eq 0 ]]; then
    echo "Manifest update requested"
    exit 0
else
    echo "Manifest update failed"
    exit 1
fi
I hope this post has been helpful in deploying this tool using Azure Automation. If there are any issues or features you'd like to report, they can be reported on the GitHub repo.