

After a cold summer break here in Sweden, seriously, temperature peaked at 22 degrees celsius on my vacation I am back, already ready for another vacation with some warmth ☺️
But hey, let's switch gears and talk about something cool and fun that happened just before my vacay. I released a tool that brings together Intune and AutoPkg to allow for an automated application upload and update process.
This tool called Intune Uploader, it is a set of custom processors for AutoPkg focused on Intune management.
And, since PKG (unmanaged apps) is now released (in preview) it opens the door for deploying virtually any app with Intune to macOS devices. Just yesterday I also updated the tool to support LOB type apps so you can deploy all types (PKG, DMG and LOB).
This post will focus on the initial setup of AutoPkg and Intune Uploader, showing you just how easy it is to get going with an automated deployment of applications. To do this we will install AutoPkg, create an App Registration in Azure, create overrides and run them.
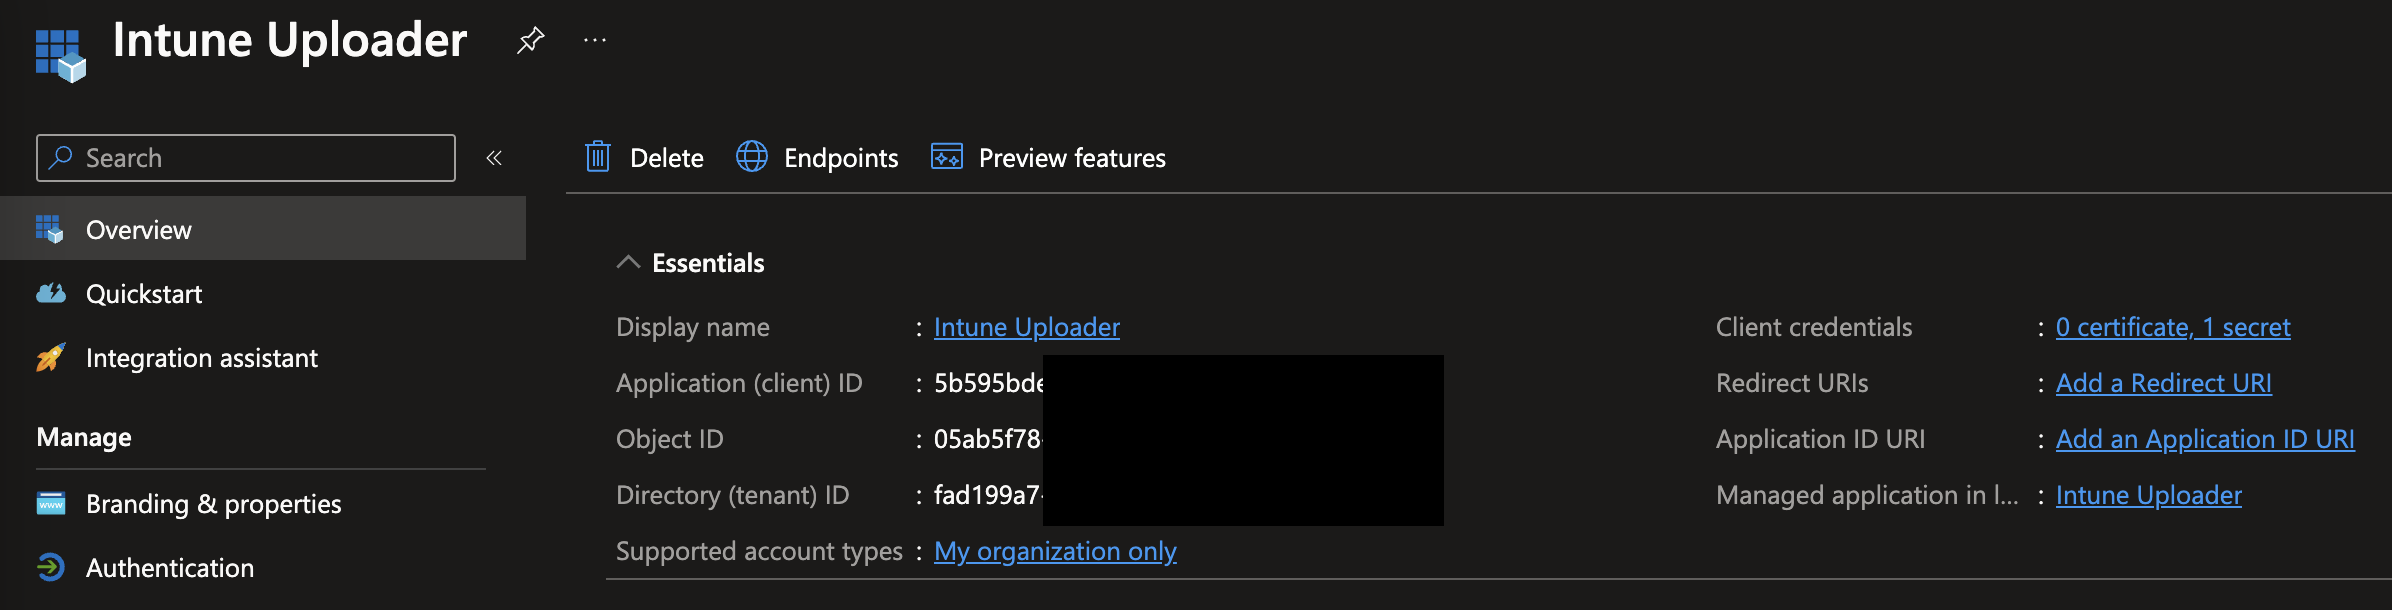
Create App Registration
Before we touch AutoPkg, lets create our App Registration to make sure we have the necessary permissions to use the tool.
- Open App Registrations in the Azure portal
- Click New registration
- Give it a Name, for example "Intune Uploader". Leave everything else to their defaults and click Register
- Copy the Application (client) ID and save for later use
- Navigate to API permissions in the left menu
- Click Add a permission
- Click Microsoft Graph
- Click Application permission
- Search for and add the following permission "DeviceManagementApps.ReadWrite.All"
- Click Grant admin consent for {yourtenant}
- Click Certificates & secrets in the left menu, choose the expiration time and set a description, then click Add
- Copy the Value and save for later use
That's it, we now have our App Registration ready.
Install AutoPkg
Now lets install and configure AutoPkg so we can actually use Intune Uploader.
-
Download the latest release of AutoPkg
-
Continue to install AutoPkg on your mac by running the downloaded PKG
-
As AutoPkg is using Git to clone repos for recipes etc. Git must also be installed. To install Git, just run git in the macOS terminal and click Install on the pop-up. If you already have Git installed, the popup will not appear. In that case continue to the next step
-
Next we will run some commands to configure AutoPkg to work with Intune Uploader, Run each command below in the terminal,
defaults write com.github.autopkg CLIENT_ID "YOUR_CLIENT_ID" defaults write com.github.autopkg CLIENT_SECRET "YOUR_CLIENT_SECRET" defaults write com.github.autopkg TENANT_ID "example.onmicrosoft.com" -
Install the required packages into AutoPkg's Python environment by running the following command,
/usr/local/autopkg/python -m pip install --upgrade requests cryptography -
Add my recipe repo to AutoPkg by running the following command,
autopkg repo-add almenscorner-recipesIf this is the first time using AutoPkg, also add the standard recipe repo
autopkg repo-add recipes
Now we are done with the setup steps and can continue to the fun things, actually running recipes and uploading apps!
Use Intune Uploader
The first thing we are going to do is create a recipe override. This recipe will let us configure some aspects of the application that will be created in Intune like the description, display name, category etc.
It is even possible to assign applications upon uploading which we'll get to.
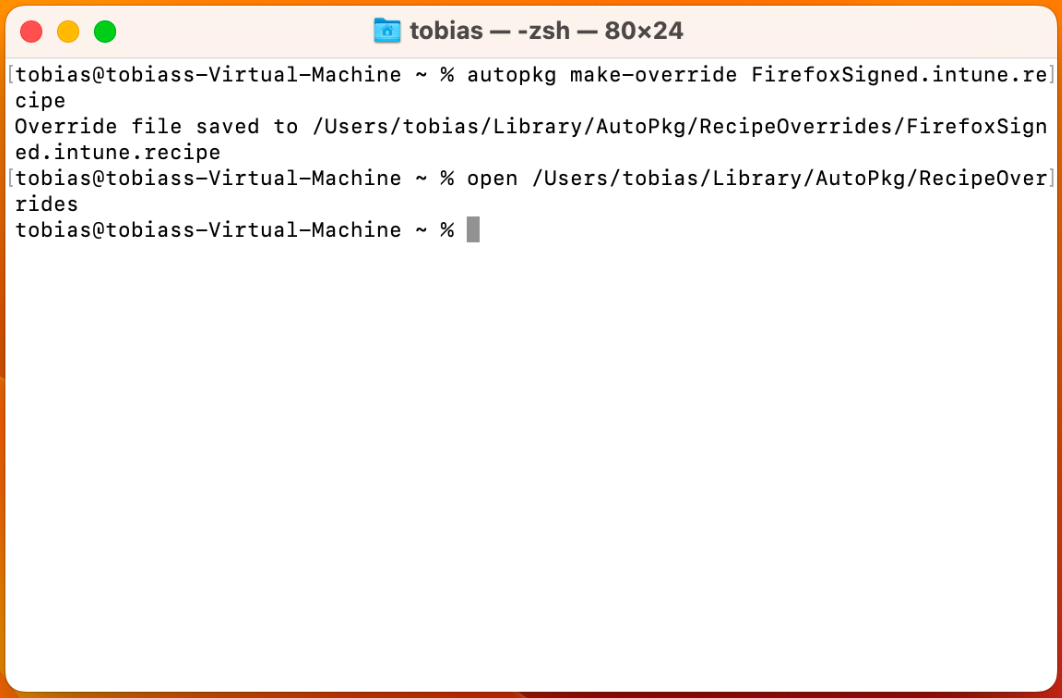
First run the below command to create an override for Firefox,
autopkg make-override FirefoxSigned.intune.recipeThis will create a file in the standard path, /Users/{username}/Library/AutoPkg/RecipeOverrides
Looking closer at this override, we can see it's an XML file that contains information about the app and parent recipes used. For the purpose of this blog we are going to have a look at the input in the recipe and change some settings. If you want to dive deeper into what the parent recipe is doing, you can find it here.
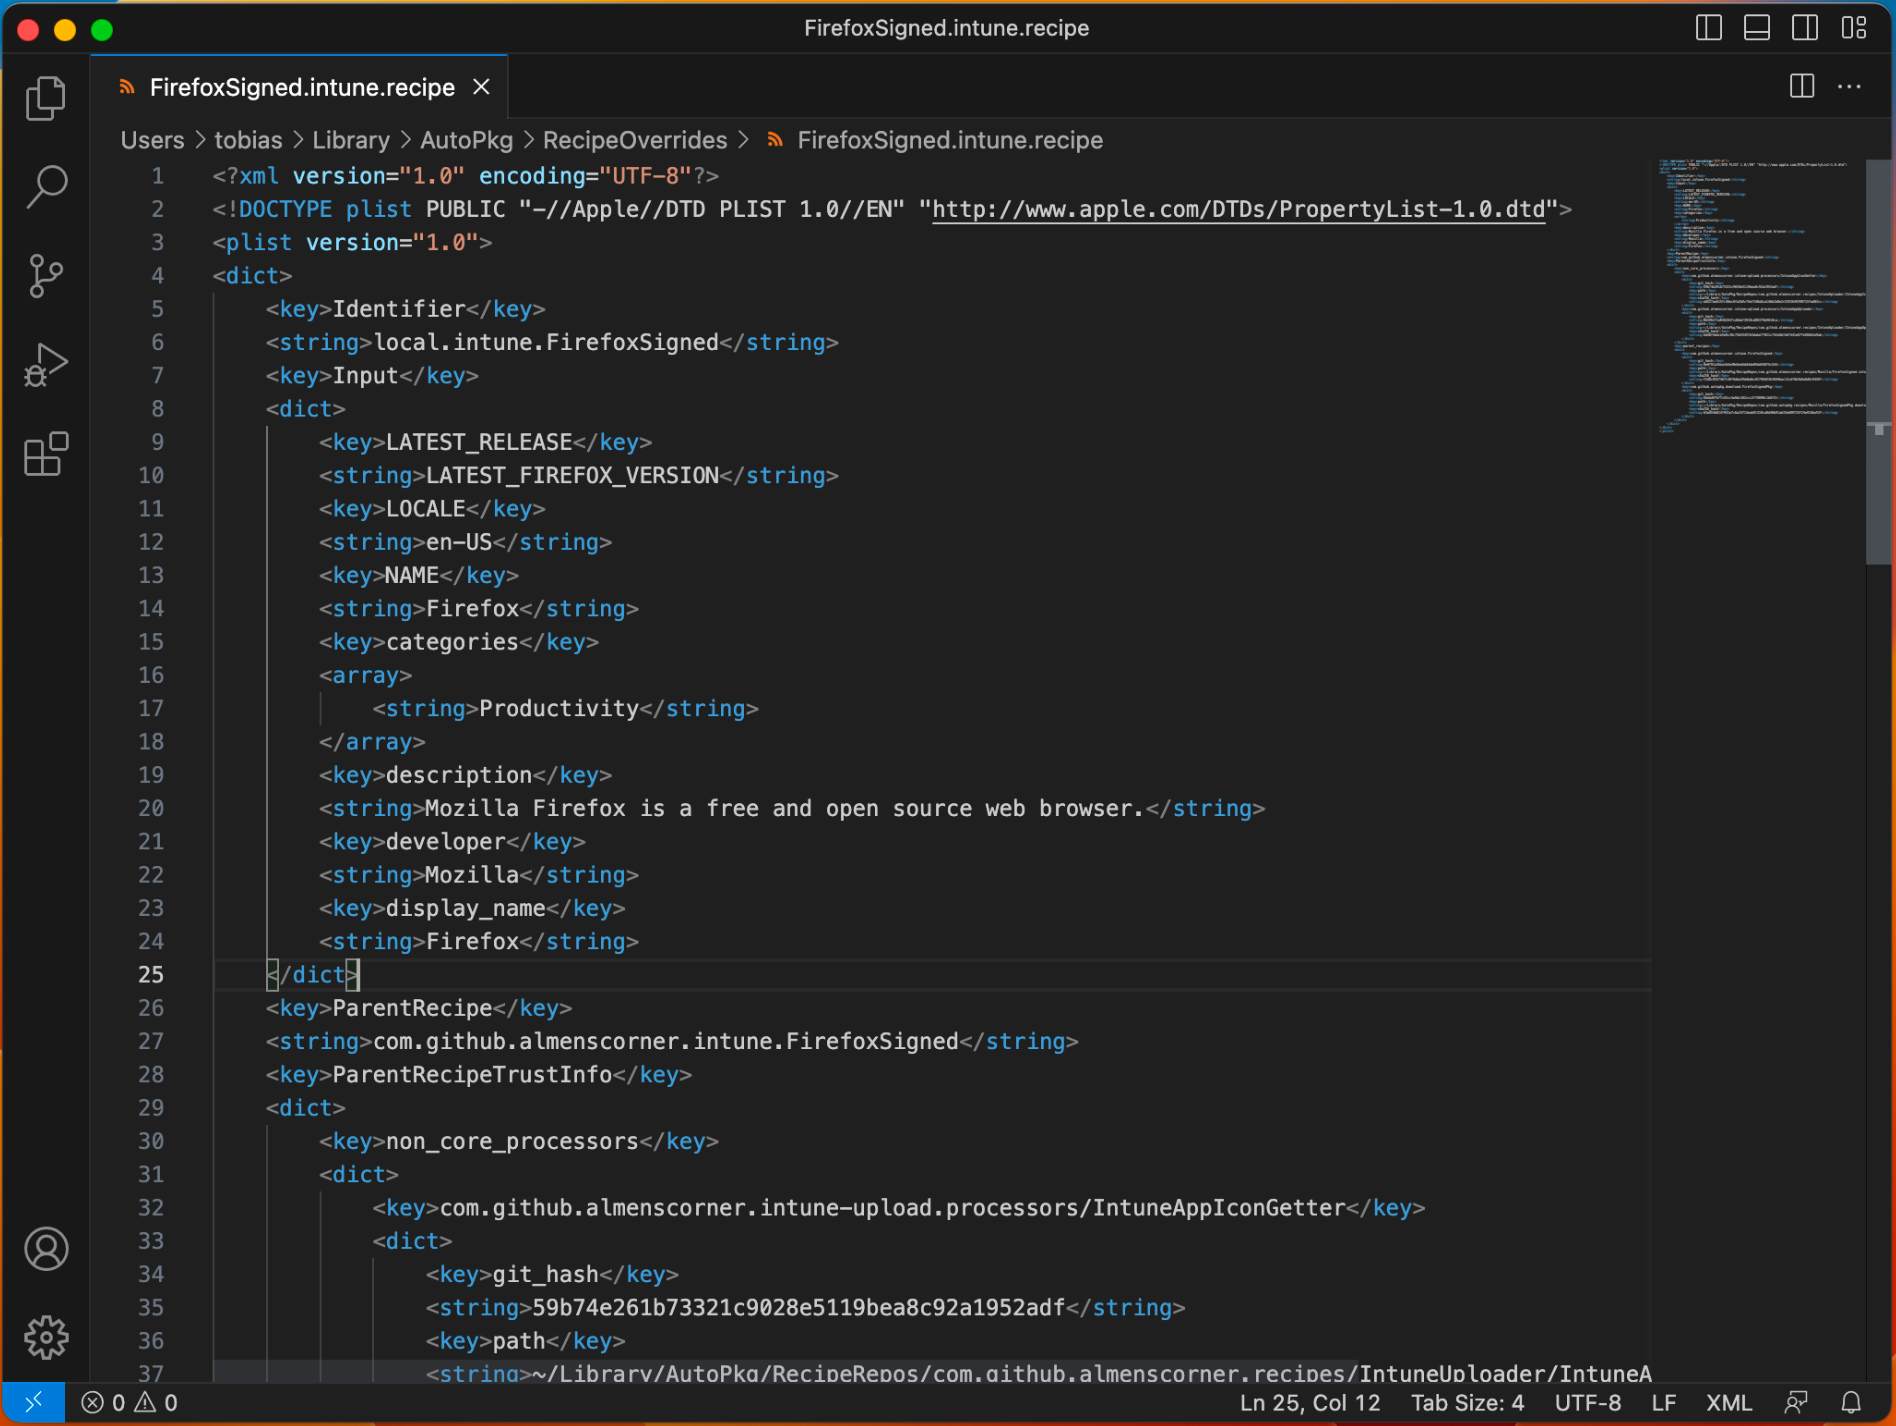
As you can see, the recipe already contains information like the display name and description. This information comes from the parent recipe and is something you can, you guessed it, override in the recipe override you created.
I'm going to leave the defaults as is right now as I created them and I like them as they are, but, we are going to do something more interesting. We are going to add assignment information for the app.
To do so, we will add a new key and an array to the input. Below is an example you can copy into your own override, you just need to switch out the group id.
<key>assignment_info</key>
<array>
	<dict>
		<key>group_id</key>
		<string>xxx-xxxxx-xxxxx-xxxx-xxxxx</string>
		<key>intent</key>
		<string>Required</string>
	</dict>
</array>
Keep in mind that the new PKG type apps only supports required assignment at the moment.
The new input looks like this,
<key>Input</key>
<dict>
<key>LATEST_RELEASE</key>
<string>LATEST_FIREFOX_VERSION</string>
<key>LOCALE</key>
<string>en-US</string>
<key>NAME</key>
<string>Firefox</string>
<key>categories</key>
<array>
<string>Productivity</string>
</array>
<key>description</key>
<string>Mozilla Firefox is a free and open source web browser.</string>
<key>developer</key>
<string>Mozilla</string>
<key>display_name</key>
<string>Firefox</string>
<key>assignment_info</key>
<array>
<dict>
<key>group_id</key>
<string>xxx-xxxxx-xxxxx-xxxx-xxxxx</string>
<key>intent</key>
<string>Required</string>
</dict>
</array>
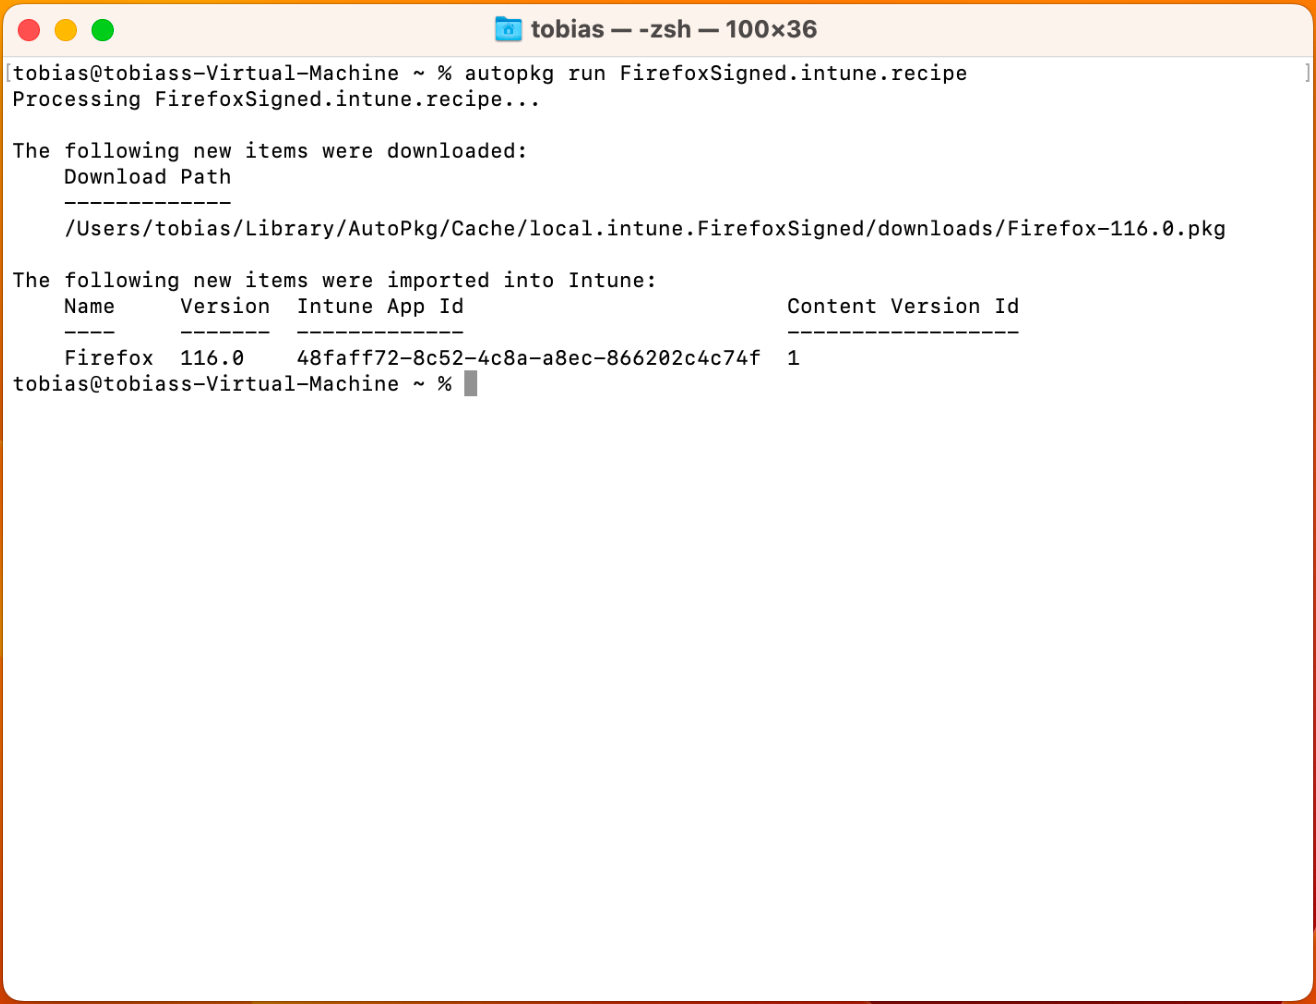
</dict>Let's now run the recipe as we are happy with the changes. To run the Firefox recipe, run the following command,
autopkg run FirefoxSigned.intune.recipeThis automatically downloads Firefox, prepares the package and uploads it to Intune. As you can see in the output below, a new application with the name "Firefox" was created with version 116.0. It also tells you the ID of the application in Intune as well as the version of the committed file.
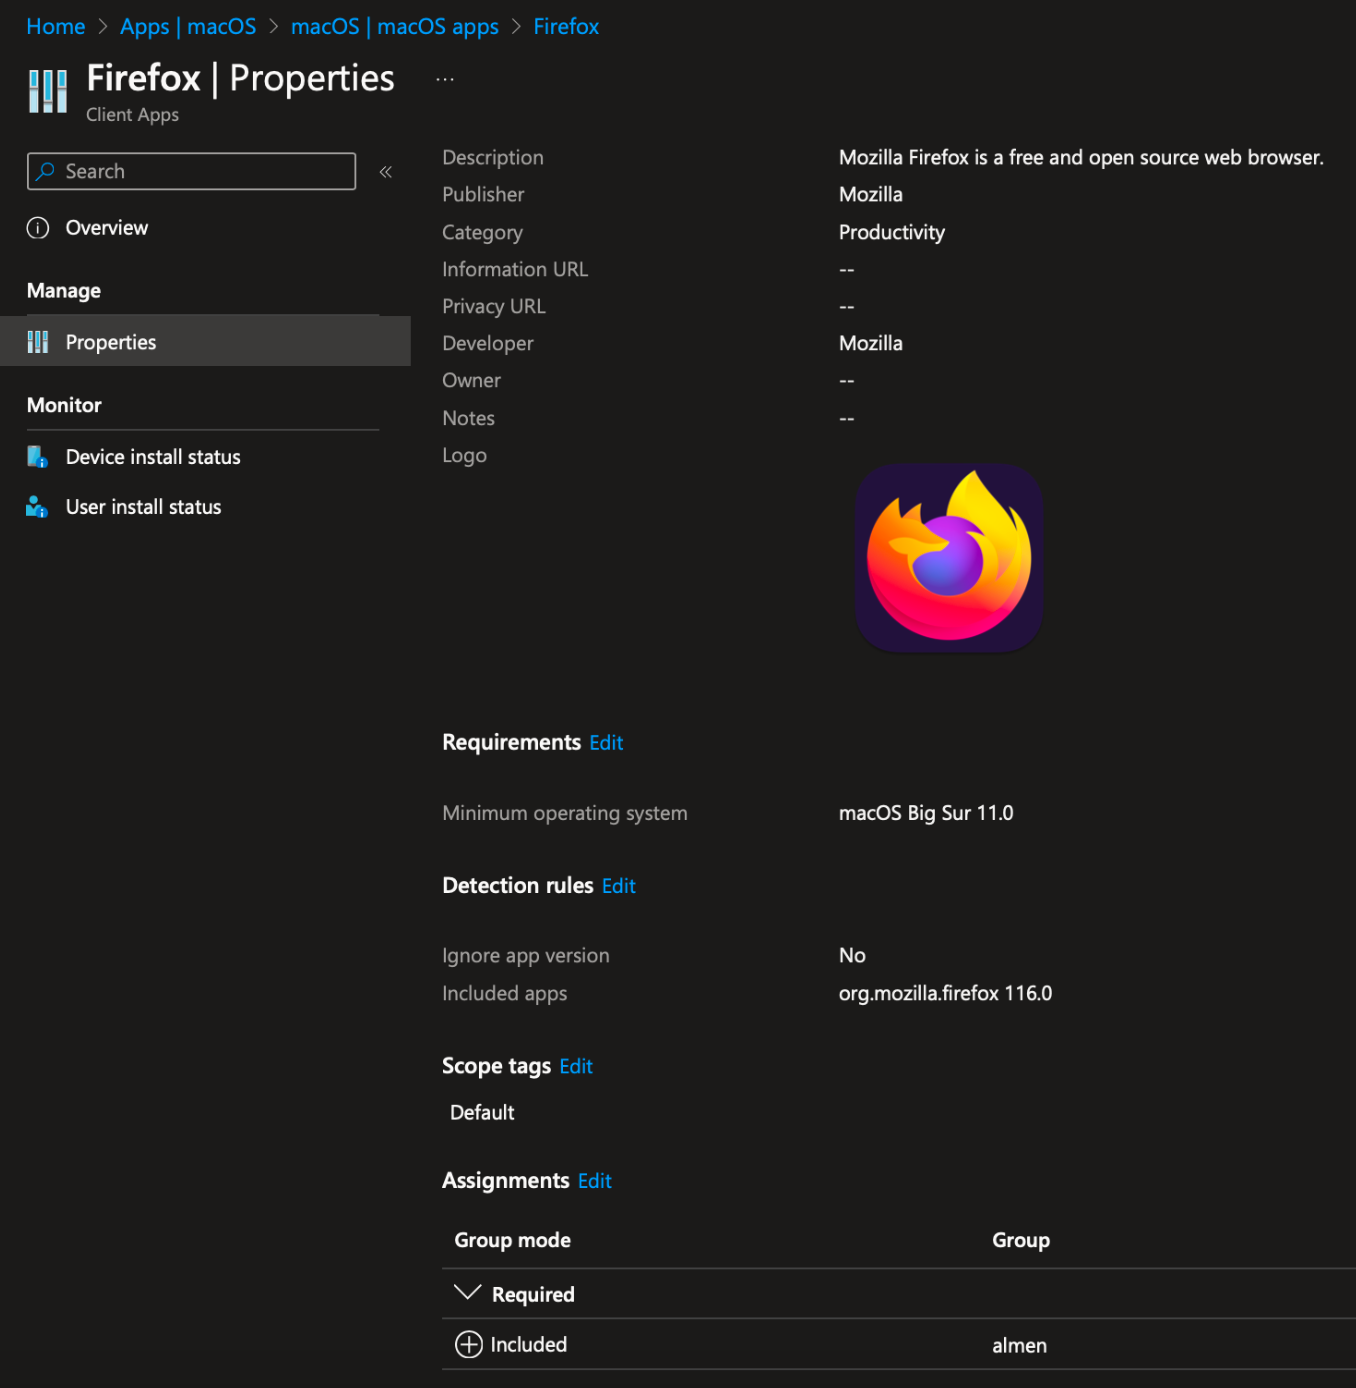
As you can see, the app is created with the information in the recipe and is also assigned!
On subsequent runs of the same recipe nothing will be uploaded to Intune unless a new version of Firefox is available, then a new app will be created.
So how do we keep Intune clean if we automatically import apps?
For this purpose I have created a processor called IntuneAppCleaner that is designed to be run as post processor to clean up old verions of applications. To use it, add --post to the AutoPkg run command and specify the required keys like this,
autopkg run -v \
--post com.github.almenscorner.intune-upload.processors/IntuneAppCleaner \
-k display_name=Firefox \
-k keep_version_count=2 \
FirefoxSigned.intune.recipe
This will keep the latest two versions of Firefox, older is removed. The default value of keep_versions is three.
LOB app type
The above steps added Firefox as a unmanaged PKG in Intune, but what if you instead want to add it as an LOB type to assign it as available in the Company Portal for your users?
Before an app is uploaded as an LOB app, there are some important prerequisites you need to take into consideration.
- The .pkg file is a component package or a package containing multiple packages.
- The .pkg file does not contain a bundle or disk image or .app file.
- The .pkg file is signed using a "Developer ID Installer" certificate, obtained from an Apple Developer account.
- The app is notarized
- The .pkg file contains a payload. Packages without a payload will attempt to re-install as long as the app remains assigned to the group.
Mozilla offers a signed and notarized package of their application so we can easily upload this as an LOB app in Intune. All you need to do is add the below key to the input in the override,
<key>lob_app</key>
<true/>
The application will now be added as an LOB instead of unmanaged PKG. This also allows you to change the assignment from Required to Available.
<key>assignment_info</key>
<array>
<dict>
<key>group_id</key>
<string>xxx-xxxxx-xxxxx-xxxx-xxxxx</string>
<key>intent</key>
<string>Available</string>
</dict>
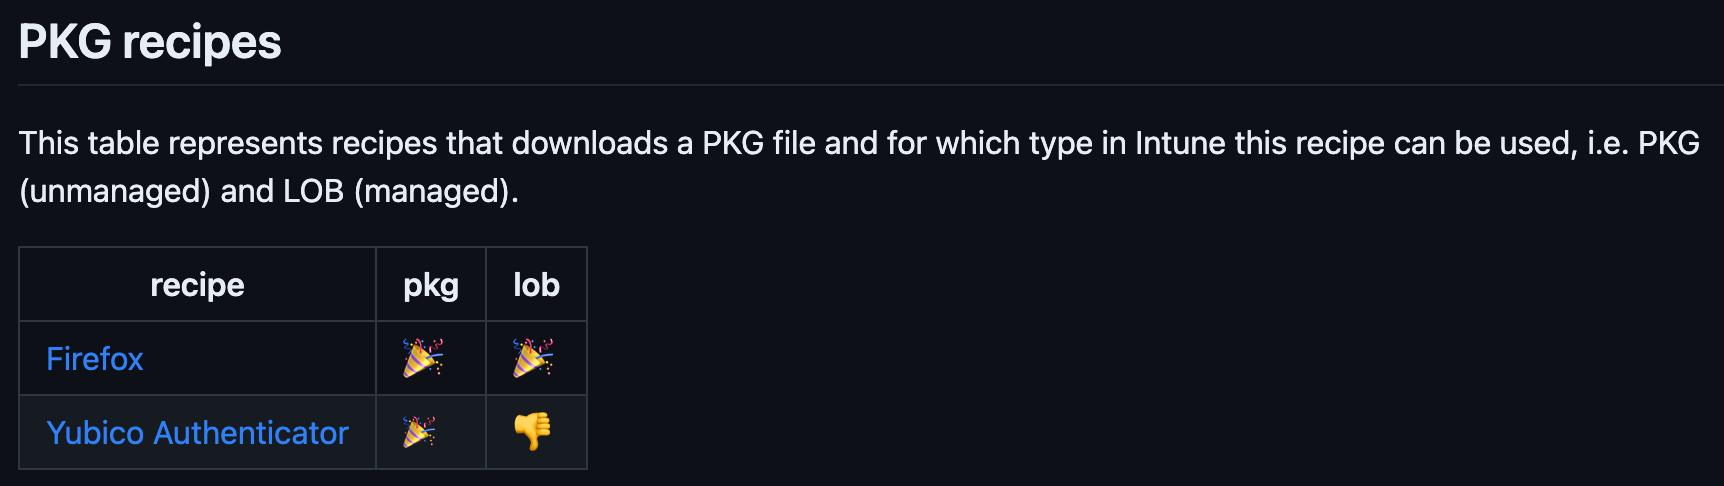
</array>I am going to do my absolute best to verify which recipes works as a LOB app and unmanaged PKG app. This table in the wiki will show you this information so you don't have to test it yourself.
Wrapping up
This post has shown you just how easy it is to start using Intune Uploader to achieve automation in your application management endeavors on macOS. We changed some input variables to assign the application and changed the type to LOB, to find more details on the input variables and what they do, see the wiki.
All recipes that I have created and is ready to use is found in the recipe repository. Recipes are added continuously and I encourage you to take part and create recipes and add them to the repository via pull requests.
Now, get going and automate!