
In my last post, I said that would probably be the last Munki related post in a while but I couldn't resist myself.
So far, we have implemented Munki with MEM and setup a pipeline in Azure DevOps to automatically sync our changes to the Munki repository. While this is great and significantly improves the package handling, you still have the manual step where you download the app, import to Munki, modify etc. And the same goes for every update that comes after that, on top of that, keeping track of all the updates. It is a time-consuming task and I bet you'd rather put that time to use elsewhere.
Today, we're going to setup AutoPkg to run on Azure DevOps with a hosted macOS agent to run our Pipeline to automatically update packages and add new packages easier.
AutoPkg
AutoPkg is a framework that automates the tasks usually performed manually in regards of app packaging and distribution, the steps are defined in a "recipe" in YAML or PLIST format and run automatically instead of manually doing each step.
There are a number of recipe repositories out there from which you can pick the packages you want to deploy, the awesome thing is that there are ".munki" recipes. These are prepared to be used in combination with Munki to get them into the repository. If you're not familiar with AutoPkg, I encourage you to read more here.
We are going to use AutoPkg's repo, you can find a list of available repos here.
To get all of this to run in Azure DevOps, I'm using a script which first was created by Facebook's CPE team and modified by Gusto's CPE team. Big thank you to these great guys for doing the heavy lifting. I have modified the script from Gusto to run in Azure DevOps instead of GitHub Actions and to use a Teams Webhook instead of Slack.
This setup is heavily based on Gusto's project.
Workflow
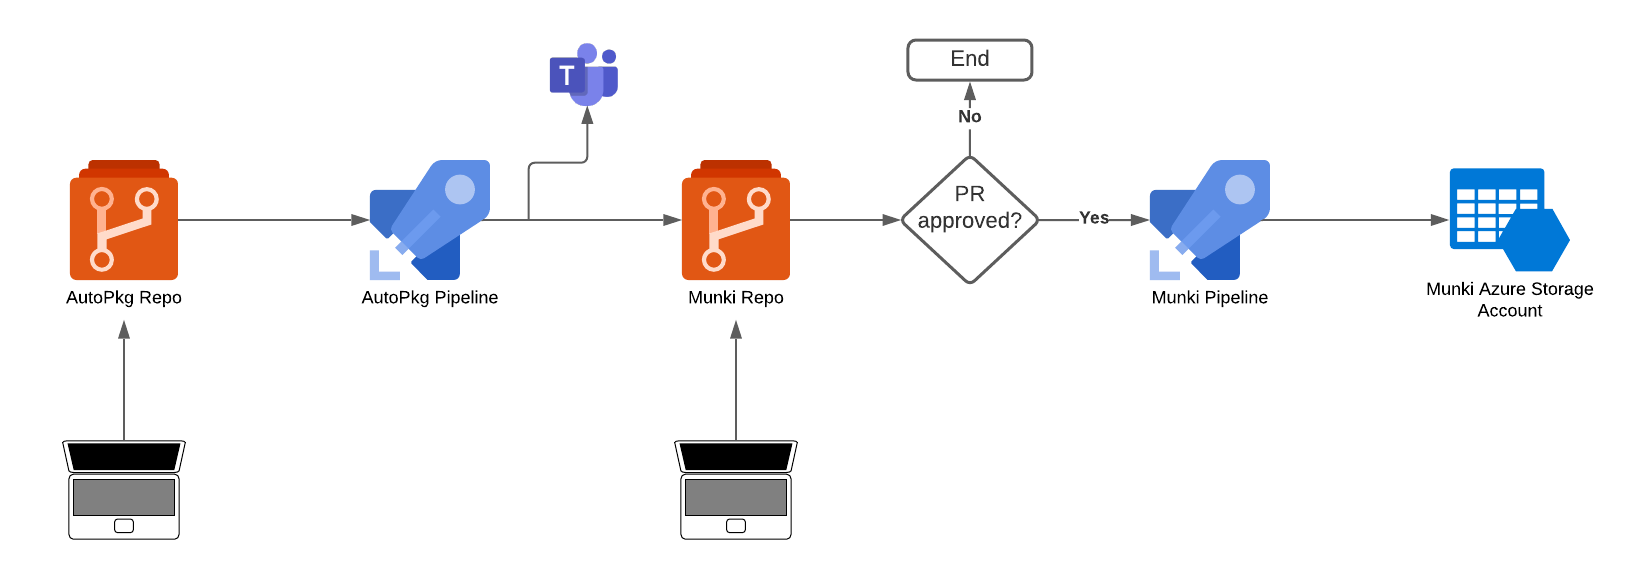
What does the flow look like?

- It starts with the admin creating the recipes which then pushes them to the AutoPkg repo
- AutoPkg Pipeline runs once a day and performs the following steps
- checks out the latest version of our AutoPkg recipe overrides
- Installs Python requirements
- Installs Munki and AutoPkg
- Checks out the Munki repository
- Runs my version of Gusto's autopkg_tools.py, successful builds are then pushed in to the Munki repository
- Build information is sent to a Teams channel
- Admin creates a PR to merge the new/updated apps branch to the main branch
- If the PR is approved and merged, the Munki Pipeline kicks off and the new/updated app is synced to the Munki repo, if not, no action is taken
One thing to note here is that each package is downloaded every time the pipeline runs.
This workflow is tightly integrated with the previous post on setting up a pipeline in Azure DevOps to sync changes to the Munki repository to the Azure Storage Account. If you want to set this up, you should read that post first as we'll set this up within the same project.
Setting it all up
So, let's begin creating our repository, pipeline and add some recipes!
- Open the Azure DevOps portal and open your Munki project
- Browse to Repos in the left navigation bar
- At the top, click on your repo name, then click New repository
- Provide a Name and click Create
- Create a folder on your device that we'll push to Azure DevOps
- Open the Terminal app
- Clone my GitHub repo which contains all required files by running,
git clone https://github.com/almenscorner/AutoPkgAzureDevOps.git
- Copy all files from the clone to the folder you created earlier
- Cd to the same folder
- Run the following commands,
git init
git remote add origin https://{AzureDevOpsOrgName}@dev.azure.com/{AzureDevOpsOrgName}/{AzureDevOpsPojectName}/_git/{AzureDevOpsRepoName}
git add --all
git commit -m 'initial commit'
git push origin HEAD:main # if you do not have a personal access token you must provide one now
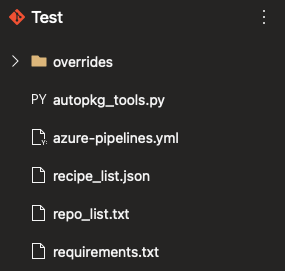
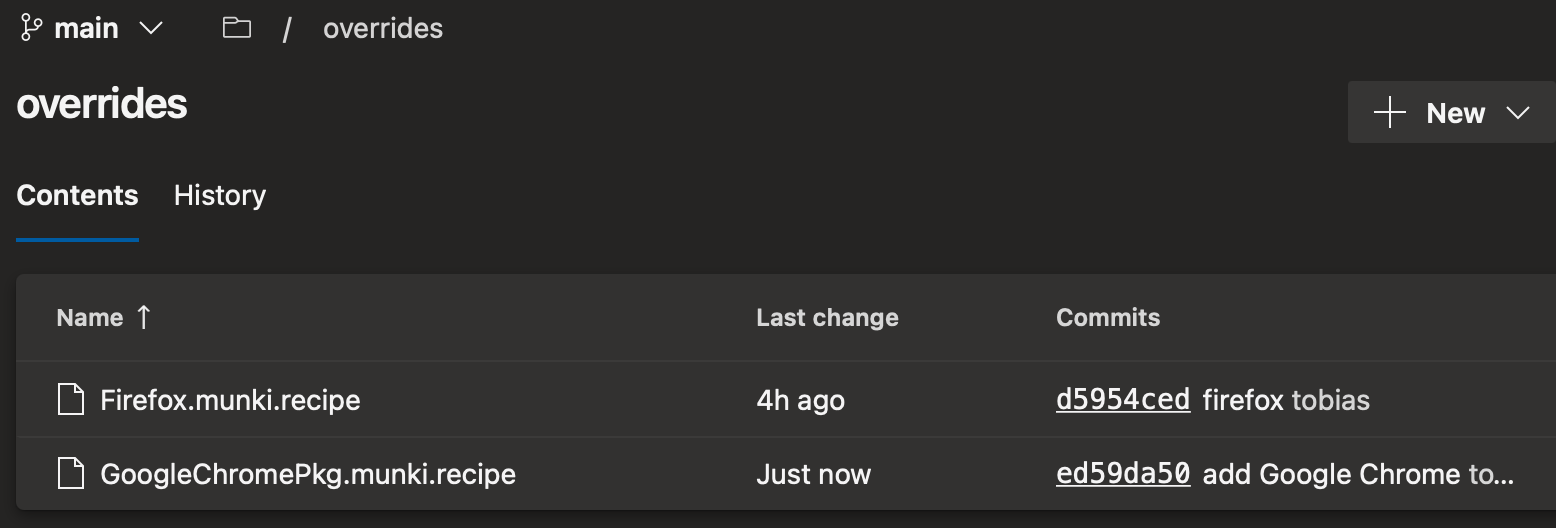
After the above steps is done, you now have a structure like below. In the cloned repo, I have added Firefox as an example. Next we'll create our own override and push that back to the Azure DevOps repo.
Note: If you want to add other AutoPkg repos, remember to add them to repo_list.txt
Let's create the Pipeline
- Browse to Pipelines and click New pipeline
- On Where is your code? choose Azure Repos Git and select your AutoPkg repo, this should automatically find the YAML file
- Before you save, edit the variables and add your environments parameters. For reference, this is my config,
variables:
  OVERRIDESEXISTS: False
  DEVOPS_ORGNAME: "almensdevops"
  AUTOPKG_REPO_NAME: "AutoPkg"
  MUNKI_DEVOPS_PROJECT: "Munki"
  MUNKI_DEVOPS_REPO_NAME: "Munki"
  MUNKI_REPO: $(Build.SourcesDirectory)/$(MUNKI_DEVOPS_REPO_NAME)/AzureBlob
  OVERRIDES_DIR: $(Build.SourcesDirectory)/$(AUTOPKG_REPO_NAME)/overrides
  REPO_DIR: $(Build.SourcesDirectory)/$(AUTOPKG_REPO_NAME)
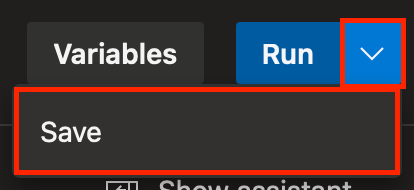
- Once you've provided your paramters, save the pipeline
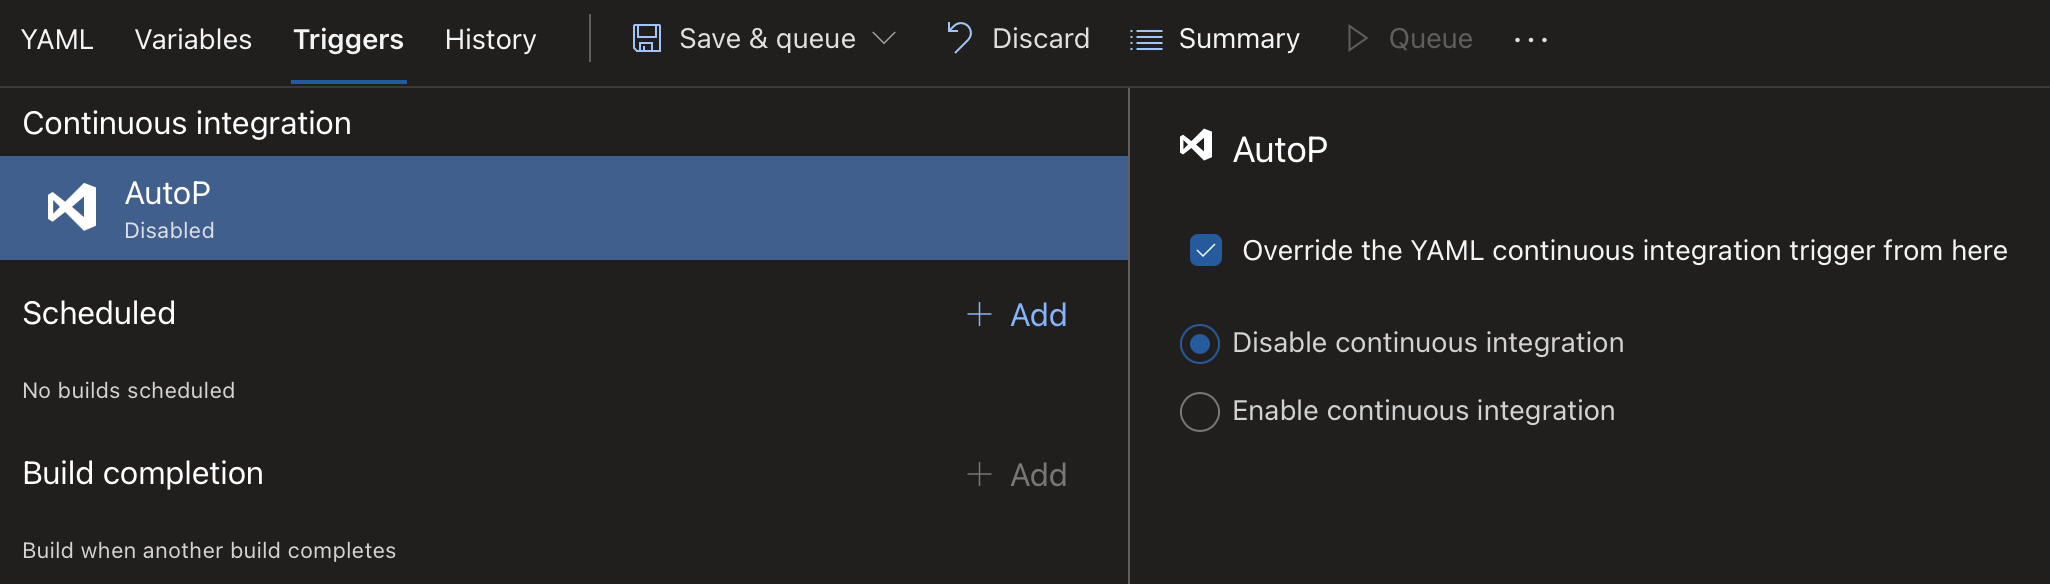
- If you don't want the pipeline to run every time main branch is updated, you have to turn off Continuous Integration as this is enabled by default
- The pipeline is configured to run on a schedule with cron, feel free to edit this to fit your needs,
schedules:
  - cron: 00 7 * * 1-5
    branches:
      include:
      - main
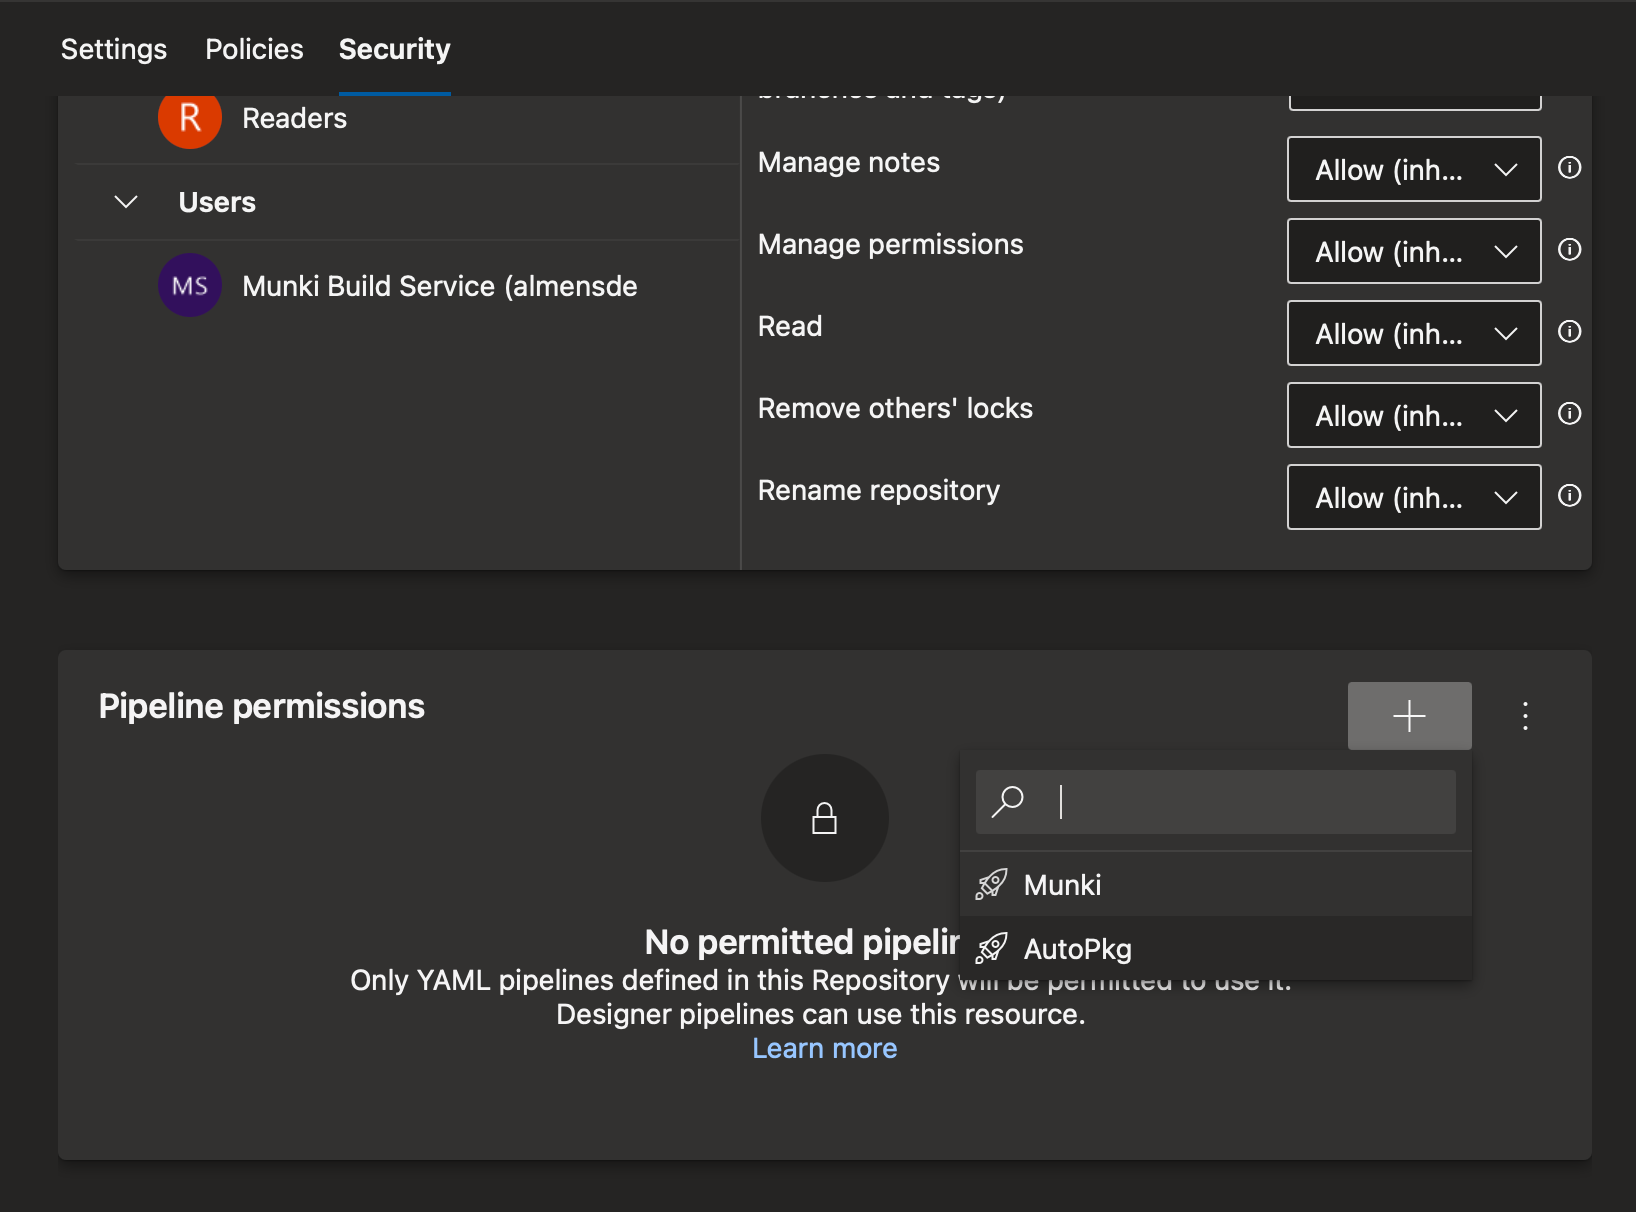
Now we have to give our AutoPkg pipeline permissions to the Azure DevOps Munki repo.
- In Azure DevOps, go to Project settings, repositories and click on your Munki repo
- Browse to Security, under Pipeline permissions, click + and choose your AutoPkg pipeline, also give the "{ProjectName} Build Service (OrgName)" Create Branch permissions as this will be done by the script
Create package overrides
- Install AutoPkg on your device by downloading it from AutoPkg's GitHub
- When installed, point AutoPkg override folder to the
overridesin your repo folder by running the following command,
defaults write com.github.autopkg RECIPE_OVERRIDE_DIRS /path/to/overrides
- Next add AutoPkg's repo by running,
autopkg repo-add https://github.com/autopkg/recipes
- You can get a list of recipes in the repo by running,
autopkg list-recipes
#it is also possible to search using: autopkg search "appName"
- Find a recipe for an app you wish to test adding to your repo, then run
autopkg make-override {AppName}.munki.recipe
- you will get an output like the below,
% autopkg make-override GoogleChromePkg.munki.recipe Override file saved to /Users/tobias/Documents/AlmensGit/AutoPkg/overrides/GoogleChromePkg.munki.recipe
- Looking inside the created override you can see the following keys,
<key>DOWNLOAD_URL</key>
<string>https://dl.google.com/chrome/mac/stable/accept_tos%3Dhttps%253A%252F%252Fwww.google.com%252Fintl%252Fen_ph%252Fchrome%252Fterms%252F%26_and_accept_tos%3Dhttps%253A%252F%252Fpolicies.google.com%252Fterms/googlechrome.pkg</string>
<key>MUNKI_REPO_SUBDIR</key>
    <string>apps/Google</string>
<key>NAME</key>
    <string>GoogleChrome</string>
<key>pkginfo</key>
- One reference to Munki is
MUNKI_REPO_SUBDIR, this key specifies where in the /pkgs folder in the Munki repo this app should be placed, digging deeper we have more Munki parametes underpkginfo
<key>blocking_applications</key>
<array>
<string>Google Chrome</string>
</array>
<key>catalogs</key>
<array>
<string>testing</string>
</array>
<key>description</key>
<string>Chrome is a fast, simple, and secure web browser, built for the modern web.</string>
<key>developer</key>
<string>Google</string>
<key>display_name</key>
<string>Google Chrome</string>
<key>name</key>
<string>%NAME%</string>
<key>unattended_install</key>
<true/>
- Per default, most apps will be placed in a catalog called "testing". If you want to change this you can just edit this file and save it. If you want to do it via Terminal you can use the following command, this is only an example but gives you an idea,
plutil -replace Input.pkginfo.catalogs -xml "<array><string>import</string></array>" /path/to/App.munki.recipe
- Once you have your overrides push the changes to the Azure DevOps repo,
git add --all
git commit -m 'added "appname"
git push origin HEAD:main
- You now have an override for the app you chose
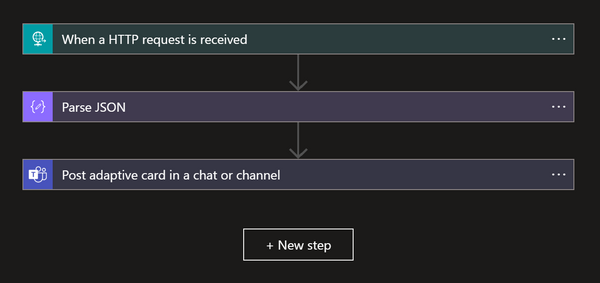
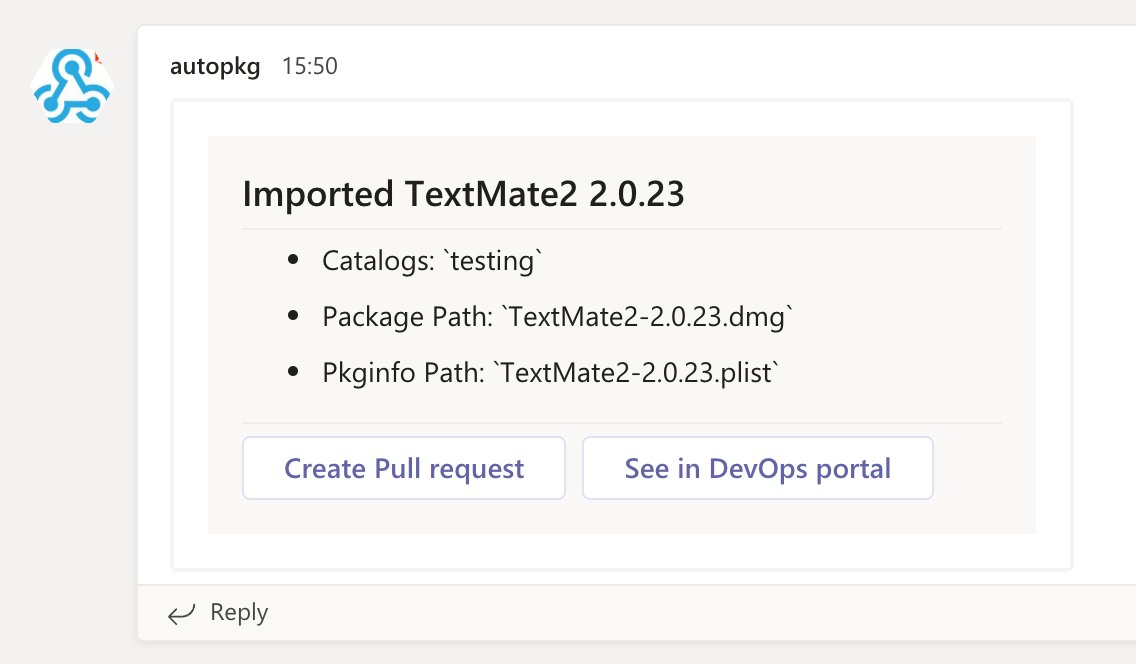
If you want messages on builds in Teams, the script is prepared to use a Teams Webhook. The message sent looks like below, this makes it easy to keep an eye on when something is updated or added. There's also buttons on the card to quickly create Pull Requests.
If you wish to use this, create a Webhook in Teams, and add it as a secret variable to your pipeline by,
- Browsing to Pipelines and click the three dots at the end of your AutoPkg pipeline and choose Edit
- Click Variables at the top right, then click +
- Provide the name TEAMS_WEBHOOK, paste your webhook in the Value field, tick the box Keep this value secret and then click Ok

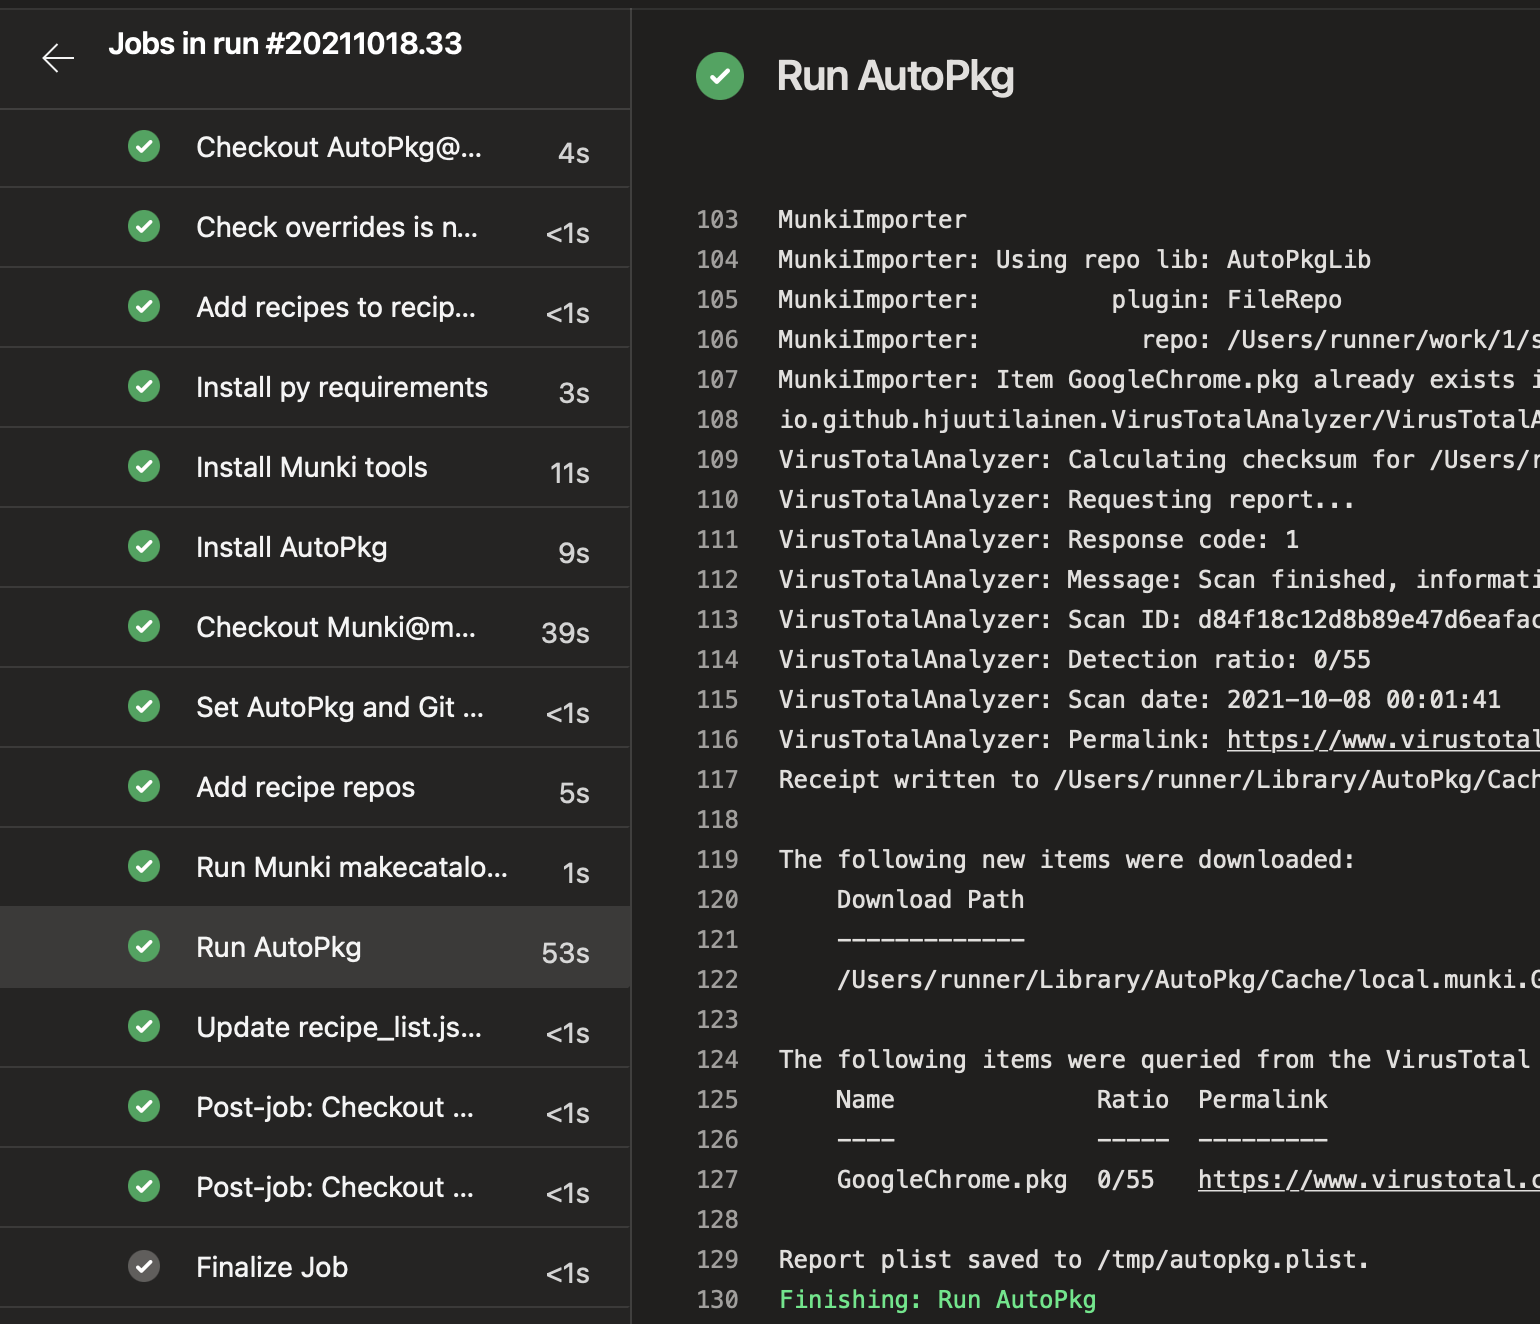
Let's test the pipeline by kicking of a manual run, Browse to Pipelines, click on the AutoPkg pipeline and at the top right, click Run pipeline and then Run
The pipeline will now download and prepare packages for everything you added in overrides. It also uses hjuutilainen's VirusTotalAnalyzer
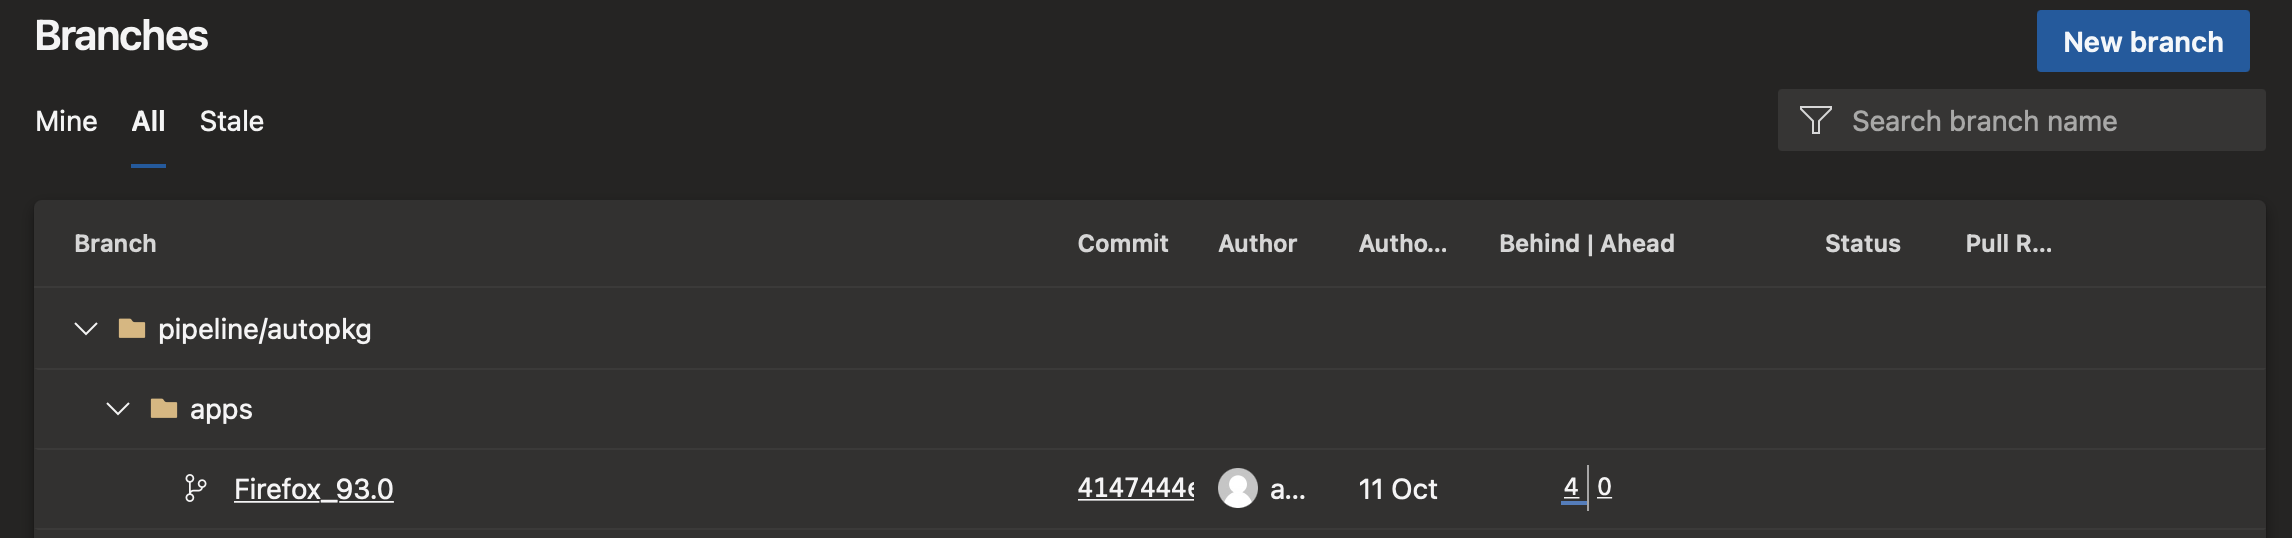
To add the app to Munki, you have to create a Pull Request to merge the changes into the main branch. This is a manual step because I want some level of control before the app is imported. Open your Munki repo and go to Branches. Under all, you can see that the AutoPkg pipeline created a branch for the app that was pushed.
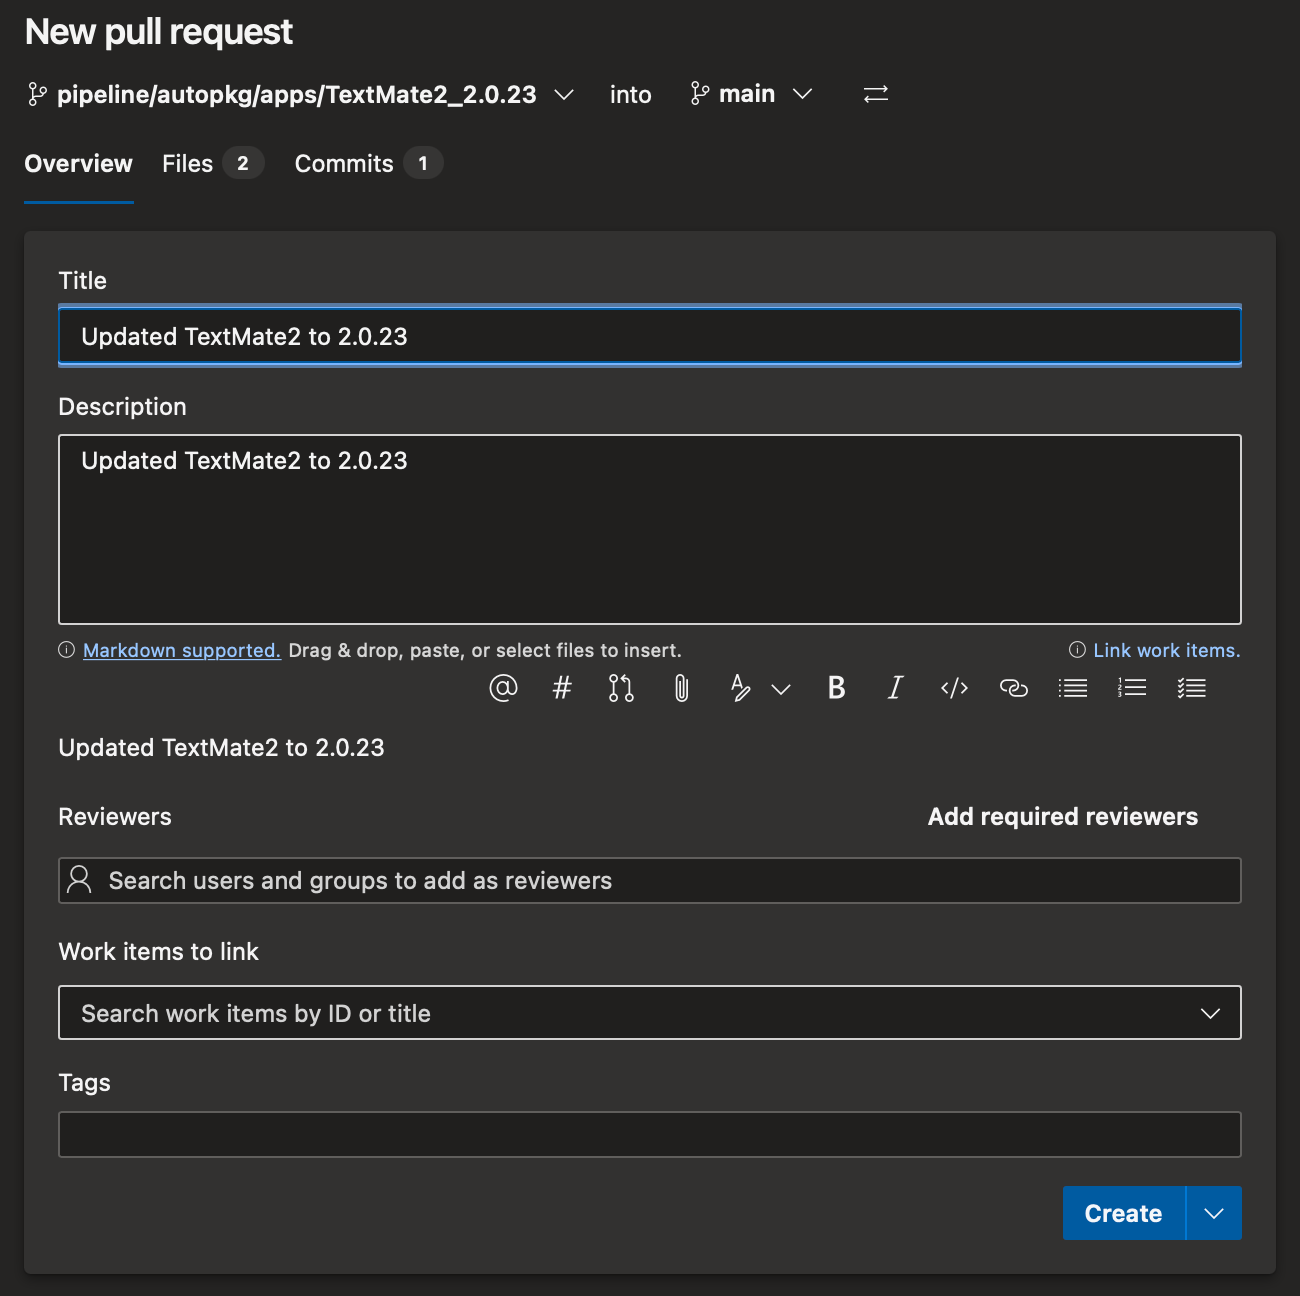
To merge the branch and thereby adding it to Munki, browse to Pull requests, click New pull request, choose the new app branch and click Create. To merge the changes, click Complete at the top right. I like to delete the branch at merge to keep it clean. You could also click "Create Pull request" on the card in Teams if you set up the Webhook.
If you have setup the Munki pipeline according to my previous post, it will now run and sync the app to the Munki repo on Azure Storage.
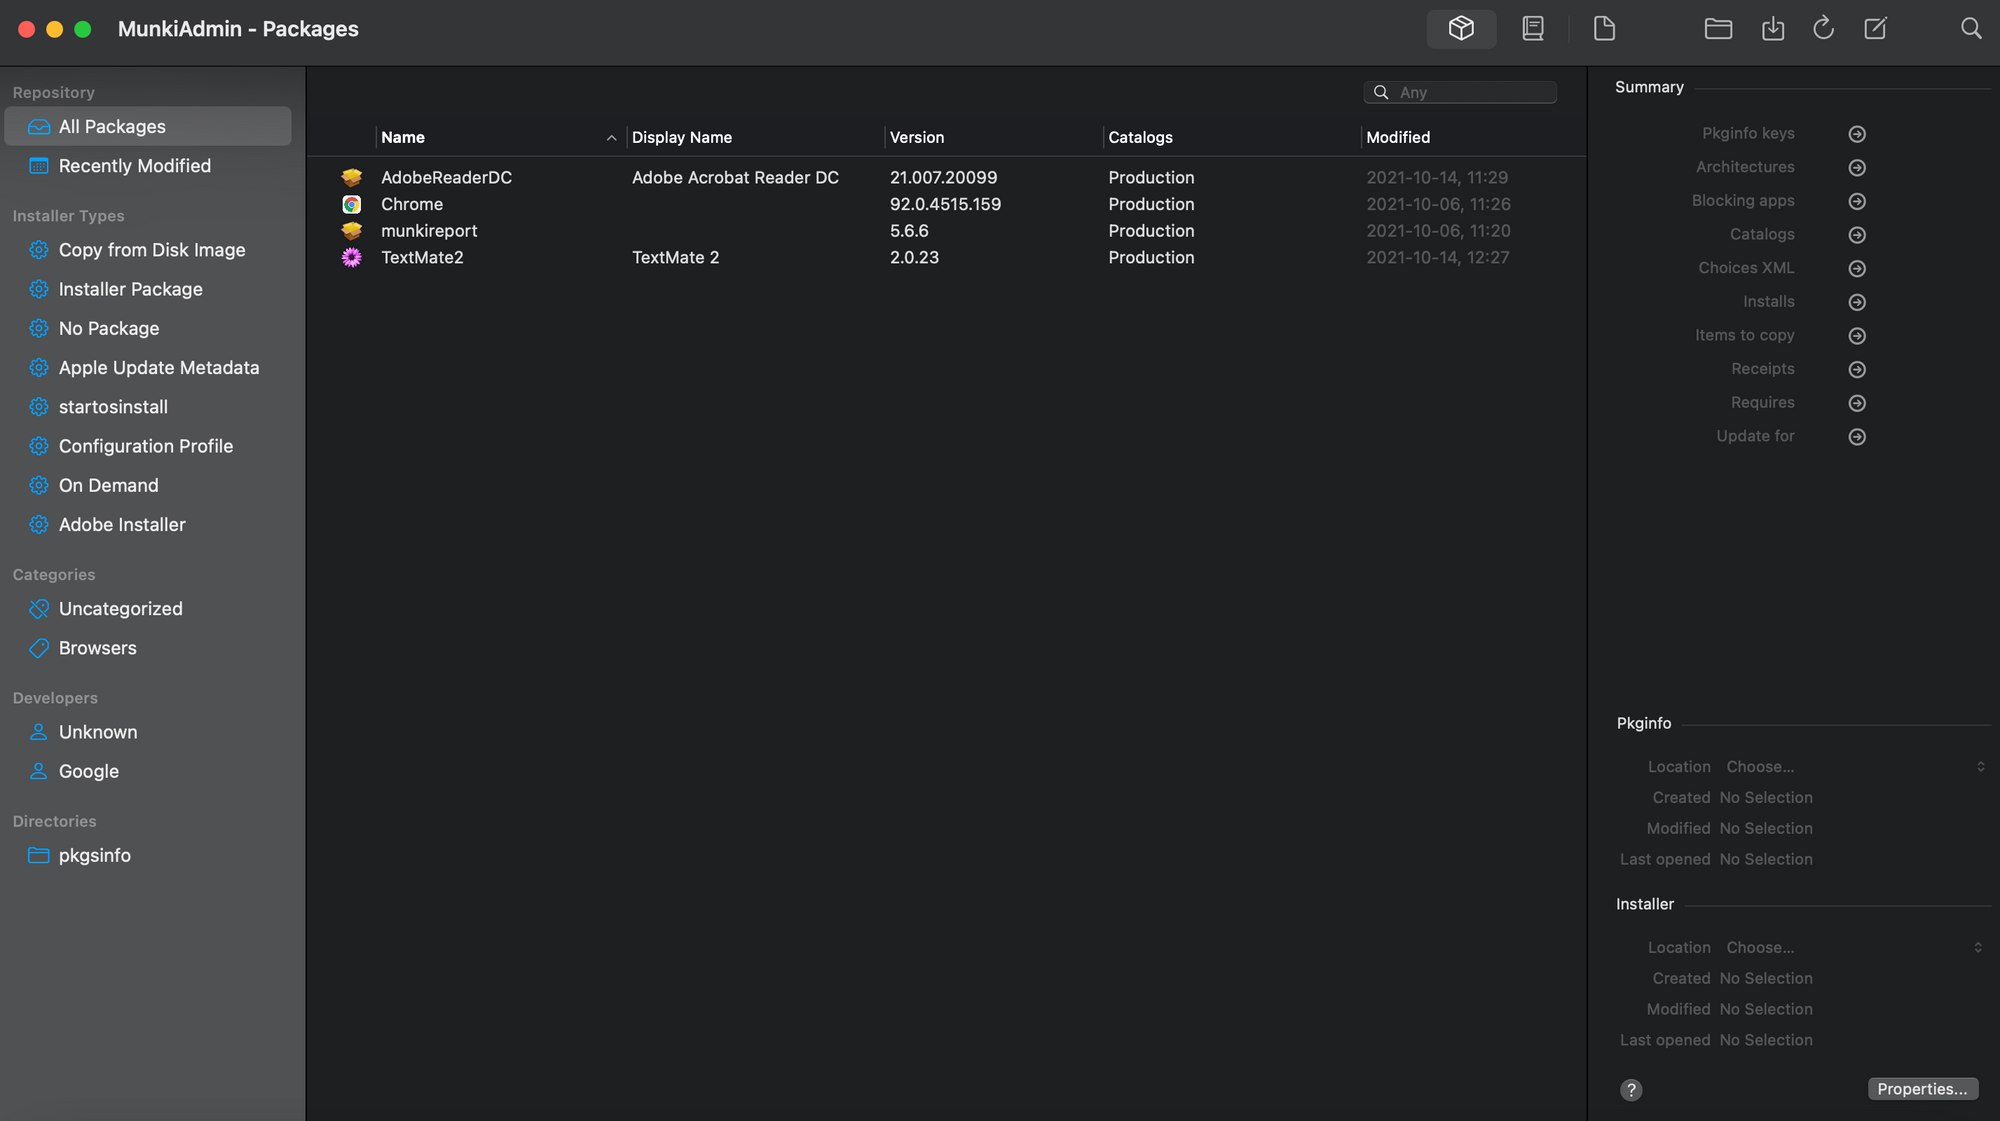
And there we go, the app is now imported to Munki. If you pull down changes to your device on the Munki repo and open MunkiAdmin, you can now see the app and edit it like you normally would. Since the AutoPkg pipeline runs daily you will automatically get updates to the packages added using this method, so you don't have to do it manually.
To add new apps, all you have to do is create a new override, commit it and then merge the changes in the Munki Repo! ☺️
Next time, we are looking at auto promoting packages from the "testing" catalog to build update rings and automatically push to groups of users until we reach production.